User:Mesherada/WayTooLongNewPlayersGuide: Difference between revisions
(Talked about Harvest Season and some other various things. (I'm a bit bothered by my consistency with some words so I may make further changes to the guide later.)) |
(More additions and various changes. Fixed some of the issues I felt last night. Might add more in the future, who knows!) |
||
| Line 8: | Line 8: | ||
[[File:Mesherada's Elin Guide Image 62.jpg]] | [[File:Mesherada's Elin Guide Image 62.jpg]] | ||
'''One thing to note, though, is that this guide is extremely tailored toward my own playstyle, so while I hope it’ll help, keep in mind it’s very “me” and I’ll be somewhat biased in various places, I’m sure. Emphasis on this bit, because it’s based on how I play the game, whether it’s settings, UI, gameplay focus and priorities, etc. Also this guide is up-to-date as of version Beta 22. | '''One thing to note, though, is that this guide is extremely tailored toward my own playstyle, so while I hope it’ll help, keep in mind it’s very “me” and I’ll be somewhat biased in various places, I’m sure. Emphasis on this bit, because it’s based on how I play the game, whether it’s settings, UI, gameplay focus and priorities, etc. Also this guide is up-to-date as of version Beta 22.93.''' | ||
Also check out other guides on this Wiki or ask other people for help on Discord (which I'm pretty sure is the most popular space for Elin discourse) too! | Also check out other guides on this Wiki or ask other people for help on Discord (which I'm pretty sure is the most popular space for Elin discourse) too! | ||
| Line 15: | Line 15: | ||
Why this section? Mouse to move around, WASD to move around, arrow keys to move around, right? | Why this section? Mouse to move around, WASD to move around, arrow keys to move around, right? | ||
If you Ctrl + click something that’s in a stack in your inventory, you can split it. Then, you can either drag the slider if you don’t care about being accurate (like, say, you just want to dump some excess weight temporarily), or manually type in the number to split and get that specific amount of whatever (say, if you want to deposit a certain amount of money at the banker NPC or give an ally a specific amount of money for training purposes, but more on this latter point later). | |||
The control (Ctrl) key is also extremely important. It swaps between your two hotbars on the bottom-right of your screen (well, my screen; I don’t know how it is for you). I use my hotbar 1 for combat, while hotbar 2 is for lifeskills (aka the “slow life” content, whether that’s cutting down trees, digging and mining, farming, etc.). | Something else I'll mention to add to this section is that in the settings, I personally enable “Double click to hold an item in inventory” (and disable “Hold middle mouse button to hold an item in inventory). I do this because instead of M3 (clicking with the mouse wheel), double-clicking is much more intentional. “Grabbing” things in this game is extremely important and you do it for so many things like using ranged weapons (bows, guns), throwing items or weapons (like panties), placing furniture, using furniture tickets, etc. (more on all of this later, no worries). M3 is a lot more useful for the various other interactions with items, like marking something as important or interacting with allies to give them equipment or food. (Again, this is a personally-me thing; you don’t have to do it.) | ||
The control (Ctrl) key by itself is also extremely important. It swaps between your two hotbars on the bottom-right of your screen (well, my screen; I don’t know how it is for you). I use my hotbar 1 for combat, while hotbar 2 is for lifeskills (aka the “slow life” content, whether that’s cutting down trees, digging and mining, farming, etc.). | |||
[[File:Mesherada's Elin Guide Image 01.jpg]] | [[File:Mesherada's Elin Guide Image 01.jpg]] | ||
| Line 40: | Line 42: | ||
[[File:Mesherada's Elin Guide Image 05.jpg]] | [[File:Mesherada's Elin Guide Image 05.jpg]] | ||
And with hotbars? You can also click and “pick up” spells/abilities from your ability menu to drag and drop them into your hotbar. So now, when I push | And with hotbars? You can also click and “pick up” spells/abilities from your ability menu to drag and drop them into your hotbar. So now, when I push “2”, “Poison Arrow” is now in my active box and I can cast it on my target; if I wanted to swap to “Chaos Bolt”, I could push “4” and instantly swap spells. It’s much more convenient than having to find the spell or ability somewhere in the ability menu and then right-clicking it, and then right-clicking on the target, and then repeating this process if you wanted to cast multiple spells. This is best for frequently-used spells/abilities though, since you only have 9 slots on your hotbar. Oh, and “q” clears the active box, so you’d stop “prepping” the spell (for example, if you don’t want to miscast on an ally or NPC). | ||
[[File:Mesherada's Elin Guide Image 06.jpg]] | [[File:Mesherada's Elin Guide Image 06.jpg]] | ||
| Line 126: | Line 128: | ||
Some allies can heal you, others can debuff the enemies, and yet others do massive amounts of boss-killing damage. And some can taunt/tank the enemies, letting you safely fight from afar. I personally run with 5 allies (my main 5 of Mesherada, my starter little girl, Melilith, Ehekatl’s Black Cat apostle, and Lulwy’s Black Angel apostle ❤️), for example, and I’m currently comfortably clearing level 70 Nefias. (I could have more allies, but I take the RP/isekai aspect of the game kind of seriously, so these are the main 5 that I love and I’m happy with. Kind of why I don’t eat any little ones/little sisters for their ADAM, since… I couldn’t. I could never lol.) | Some allies can heal you, others can debuff the enemies, and yet others do massive amounts of boss-killing damage. And some can taunt/tank the enemies, letting you safely fight from afar. I personally run with 5 allies (my main 5 of Mesherada, my starter little girl, Melilith, Ehekatl’s Black Cat apostle, and Lulwy’s Black Angel apostle ❤️), for example, and I’m currently comfortably clearing level 70 Nefias. (I could have more allies, but I take the RP/isekai aspect of the game kind of seriously, so these are the main 5 that I love and I’m happy with. Kind of why I don’t eat any little ones/little sisters for their ADAM, since… I couldn’t. I could never lol.) | ||
You do have to take care of your allies though, and one of the first ways is by appropriately gearing them up. If you wheel-click (M3), you can “Trade” with | You do have to take care of your allies though, and one of the first ways is by appropriately gearing them up. If you wheel-click (M3) on an ally, you can “Trade” with them. | ||
[[File:Mesherada's Elin Guide Image 09.jpg]] | [[File:Mesherada's Elin Guide Image 09.jpg]] | ||
| Line 134: | Line 136: | ||
[[File:Mesherada's Elin Guide Image 10.jpg]] | [[File:Mesherada's Elin Guide Image 10.jpg]] | ||
^ That lich | ^ That lich destroyed my little girl’s weapon, her [0,18] ring (so -18 PV yikes), and then my Black Cat’s food lol. By the way, after this happened, I’ve since made sure that my allies and I have never been caught without multiple fireproof and coldproof blankets ever again. | ||
But I’ll provide more info about bandages/blankets in the '''“Nefia checklist”''' section that’s next. | But I’ll provide more info about bandages/blankets in the '''“Nefia checklist”''' section that’s next. | ||
| Line 150: | Line 152: | ||
[[File:Mesherada's Elin Guide Image 13.jpg]] | [[File:Mesherada's Elin Guide Image 13.jpg]] | ||
To feed them though, I don’t drop food in their inventory as I would with items like blankets/bandages. Instead, I double-click them in my inventory to “grab” them, walk up next to an ally, and “Gift” the food to them. The primary reason is that it makes the whole experience more intimate. Even though that’s true for me, another reason that you could find to do this is because it lets you gain affinity with allies if it’s their “favorite” thing (and why not take the free affinity?). Don’t worry about affinity for now; more on that later when we talk about adventurers. | To feed them though, I don’t drop food in their inventory as I would with items like blankets/bandages. Instead, I double-click them in my inventory to “grab” them, walk up next to an ally, and “Gift” the food to them. The primary reason is that it makes the whole experience more intimate. Even though that’s true for me, another reason that you could find to do this is because it lets you gain affinity with allies if it’s their “favorite” thing (and why not take the free affinity?). Don’t worry about affinity for now; more on that later when we talk about adventurers (in the '''“Adventurers”''' section later). | ||
You also want to make sure you give your allies money too. Not only is it the kind and right thing to do (what, are you going to work your allies to death for free?), it lets them train and raise their skill potentials at a trainer when they go into a town. | You also want to make sure you give your allies money too. Not only is it the kind and right thing to do (what, are you going to work your allies to death for free?), it lets them train and raise their skill potentials at a trainer when they go into a town. To give them money, do ''not'' gift it to them though, like you would with food, since you’ll only give them one oren at a time. Instead, walk up to them, “Trade” with them (M3), and then use Ctrl + click to split up your orens and give them however much you want to by dropping it in their inventory. Every 2-3 months I typically give all of my allies (well, all 5 of them anyway, lol) a stipend of ~4k orens each, but that’s me personally! You can choose to give them however much you want (or not at all… but I don’t recommend this because not only is it cruel, they also can’t get stronger as quickly either because their skill potentials will remain at base level). | ||
[[File:Mesherada's Elin Guide Image 14.jpg]] | [[File:Mesherada's Elin Guide Image 14.jpg]] | ||
| Line 242: | Line 244: | ||
You can earn contribution points (to rise in rank in the guilds) by performing certain tasks for the guilds. The Mages’ Guild, for example, requires you to read and decipher certain books. Unlike in Elona, you do not have to drop off the books in Lumiest once you’ve read them. Once you’ve read and deciphered the book, you can just do whatever you want with it (ship it, sell it, disassemble it, etc.). However, you cannot retroactively get points for books you’ve deciphered if you read them before joining the guild. So save up all the books you have and don’t read them until you’re a member of the Mages’ Guild. Same with the Merchants’ Guild, where you get contribution points for investing in shops. You do not retroactively get contribution points if you invest in shops before joining the guild. | You can earn contribution points (to rise in rank in the guilds) by performing certain tasks for the guilds. The Mages’ Guild, for example, requires you to read and decipher certain books. Unlike in Elona, you do not have to drop off the books in Lumiest once you’ve read them. Once you’ve read and deciphered the book, you can just do whatever you want with it (ship it, sell it, disassemble it, etc.). However, you cannot retroactively get points for books you’ve deciphered if you read them before joining the guild. So save up all the books you have and don’t read them until you’re a member of the Mages’ Guild. Same with the Merchants’ Guild, where you get contribution points for investing in shops. You do not retroactively get contribution points if you invest in shops before joining the guild. | ||
For the Thieves’ Guild, by the way, you need to get a total of -100 karma. To clarify, this doesn’t mean you need to get -100 karma all in one go. It just means that you need to lose 100 karma '''''in total'''''. So you can, for example, lose 10 karma, do some quests or Nefias to bring it back up, lose 10 more, repeat, etc. And that’d be -20 out of the -100 required. Same thing here where your prior crimes don’t contribute to the -100 karma; as a result, it’s honestly best to visit all the guild towns (Port Kapul, Derphy, Lumiest, southwest-of-Mysilia) as soon as possible to accept the guild | For the Thieves’ Guild, by the way, you need to get a total of -100 karma. To clarify, this doesn’t mean you need to get -100 karma all in one go. It just means that you need to lose 100 karma '''''in total'''''. So you can, for example, lose 10 karma, do some quests or Nefias to bring it back up, lose 10 more, repeat, etc. And that’d be -20 out of the -100 required. Same thing here where your prior crimes don’t contribute to the -100 karma; as a result, it’s honestly best to visit all the guild towns (Port Kapul, Derphy, Lumiest, southwest-of-Mysilia) as soon as possible to accept the guild admission quests and start working toward them. | ||
Oh, and unlike in Elona, you can join all the guilds simultaneously. | Oh, and unlike in Elona, you can join all the guilds simultaneously. | ||
| Line 253: | Line 255: | ||
In Elin, you don’t pay your taxes at the Embassy near Palmia, however. The nearest tax box is in Mysilia (southeast of your starting Meadow area). | In Elin, you don’t pay your taxes at the Embassy near Palmia, however. The nearest tax box is in Mysilia (southeast of your starting Meadow area). | ||
[[File:Mesherada's Elin Guide Image 23.jpg]] | [[File:Mesherada's Elin Guide Image 23.jpg|1280x720px]] | ||
Once you’re there, just find a nearby guard and ask them where the “tax box” is (you can also do this to find any specific NPC and even random citizens for your | Once you’re there, just find a nearby guard and ask them where the “tax box” is (you can also do this to find any specific NPC and even random citizens for your requests if you’re delivering something to them). | ||
To pay your taxes at the tax box, “grab” (double-click) your tax bill and right-click the tax box to drop it off (it’ll also subtract the same amount of orens from your open inventory). | To pay your taxes at the tax box, “grab” (double-click) your tax bill and right-click the tax box to drop it off (it’ll also subtract the same amount of orens from your open inventory). | ||
| Line 287: | Line 289: | ||
First, a common question I see is how you know when something's ready to be reaped or harvested or not (aka when is it fully grown?). You’ll know when they’re ready to be reaped/harvested because when you hover over them with your appropriate tool in hand (axe or sickle), it’ll say “Harvest” or “Reap Seeds” and on top of your screen, it’ll say like, “Harvestable”. | First, a common question I see is how you know when something's ready to be reaped or harvested or not (aka when is it fully grown?). You’ll know when they’re ready to be reaped/harvested because when you hover over them with your appropriate tool in hand (axe or sickle), it’ll say “Harvest” or “Reap Seeds” and on top of your screen, it’ll say like, “Harvestable”. | ||
[[File:Mesherada's Elin Guide Image 58.jpg| | [[File:Mesherada's Elin Guide Image 58.jpg|1280x720px]] | ||
[[File:Mesherada's Elin Guide Image 59.jpg| | [[File:Mesherada's Elin Guide Image 59.jpg|1280x720px]] | ||
If they’re not ready, then it’ll just say “Collect” and on top of your screen, it won’t say “Harvestable”. Note that this does depend somewhat on the crop (mushrooms won’t say harvestable or whatever, for example). But the rule generally holds. | If they’re not ready, then it’ll just say “Collect” and on top of your screen, it won’t say “Harvestable”. Note that this does depend somewhat on the crop (mushrooms won’t say harvestable or whatever, for example). But the rule generally holds. | ||
[[File:Mesherada's Elin Guide Image 60.jpg| | [[File:Mesherada's Elin Guide Image 60.jpg|1280x720px]] | ||
To start out with farming though, basically, use a sickle and reap the plant/crop/whatever to get their “base seeds”. You will know you’ll be able to successfully do this when you hover over the plant with your sickle out and it says “Reap Seeds”. This will give you some +0 base seeds (I call them base seeds because they’re just the most basic seed of that plant with no additional traits). | To start out with farming though, basically, use a sickle and reap the plant/crop/whatever to get their “base seeds”. You will know you’ll be able to successfully do this when you hover over the plant with your sickle out and it says “Reap Seeds”. This will give you some +0 base seeds (I call them base seeds because they’re just the most basic seed of that plant with no additional traits). | ||
[[File:Mesherada's Elin Guide Image 31.jpg| | [[File:Mesherada's Elin Guide Image 31.jpg|1280x720px]] | ||
[[File:Mesherada's Elin Guide Image 32.jpg]] | [[File:Mesherada's Elin Guide Image 32.jpg]] | ||
| Line 309: | Line 311: | ||
[[File:Mesherada's Elin Guide Image 35.jpg]] | [[File:Mesherada's Elin Guide Image 35.jpg]] | ||
^ As seen here, after I grew the base mushroom seeds and reaped them after they were fully grown, I received | ^ As seen here, after I grew the base mushroom seeds and reaped them after they were fully grown, I received +1 mushroom seeds with Dexterity potential. After planting these ''new'' +1 seeds, I can then harvest them later (with an axe) for +1 mushroom crops with Dexterity potential. | ||
The basic idea with farming is that you’re completely subject to RNG while you’re trying to get your base seed to become +1 in a random potential “line”. Once that potential line’s been determined though, you’re set. From that point on, you can just keep reaping, harvesting, replanting, etc. that seed and it’ll eventually level up based on your Farming skill. | The basic idea with farming is that you’re completely subject to RNG while you’re trying to get your base seed to become +1 in a random potential “line”. Once that potential line’s been determined though, you’re set. From that point on, you can just keep reaping, harvesting, replanting, etc. that seed and it’ll eventually level up based on your Farming skill. | ||
| Line 317: | Line 319: | ||
Since the potential lines are RNG though, it may take a lot of base seed reaps before you get into the line you want (whether that’s strength, dexterity, magic, etc.). | Since the potential lines are RNG though, it may take a lot of base seed reaps before you get into the line you want (whether that’s strength, dexterity, magic, etc.). | ||
When reaping for seeds, you can also have a chance of getting ''multiple'' seeds. This means that you can ''reap one less crop'' for its seed, and instead ''harvest'' it for its crop product. So you saw how I got two +1 mushroom seeds? That’s 2 from that 1 crop, meaning I now have two +1 Dexterity potential mushrooms. A good rule of thumb is that you want to generally grow double of whatever crop you want; half of them you’ll reap with your sickle (and generally RNG’s favorable enough that you get enough seeds to | When reaping for seeds, you can also have a chance of getting ''multiple'' seeds. This means that you can ''reap one less crop'' for its seed, and instead ''harvest'' it for its crop product. So you saw how I got two +1 mushroom seeds? That’s 2 from that 1 crop, meaning I can now have two +1 Dexterity potential mushrooms. A good rule of thumb is that you want to generally grow double of whatever crop you want; half of them you’ll reap with your sickle (and generally RNG’s favorable enough that you get enough seeds to ''replant everything''). With the other half, you’ll harvest with your axe for the crop product. But also, back to the seed levels too. The +1 seeds right? As I level up my Farming skill further, when I’m reaping half my crops for seeds, sometimes they’ll randomly level up (to +2). This will repeat and eventually my seeds (and subsequent mushroom crop) will have much, much higher attribute potentials. And for example, this is a mushroom I harvested after planting a +29 seed. | ||
[[File:Mesherada's Elin Guide Image 37.jpg]] | [[File:Mesherada's Elin Guide Image 37.jpg]] | ||
| Line 410: | Line 412: | ||
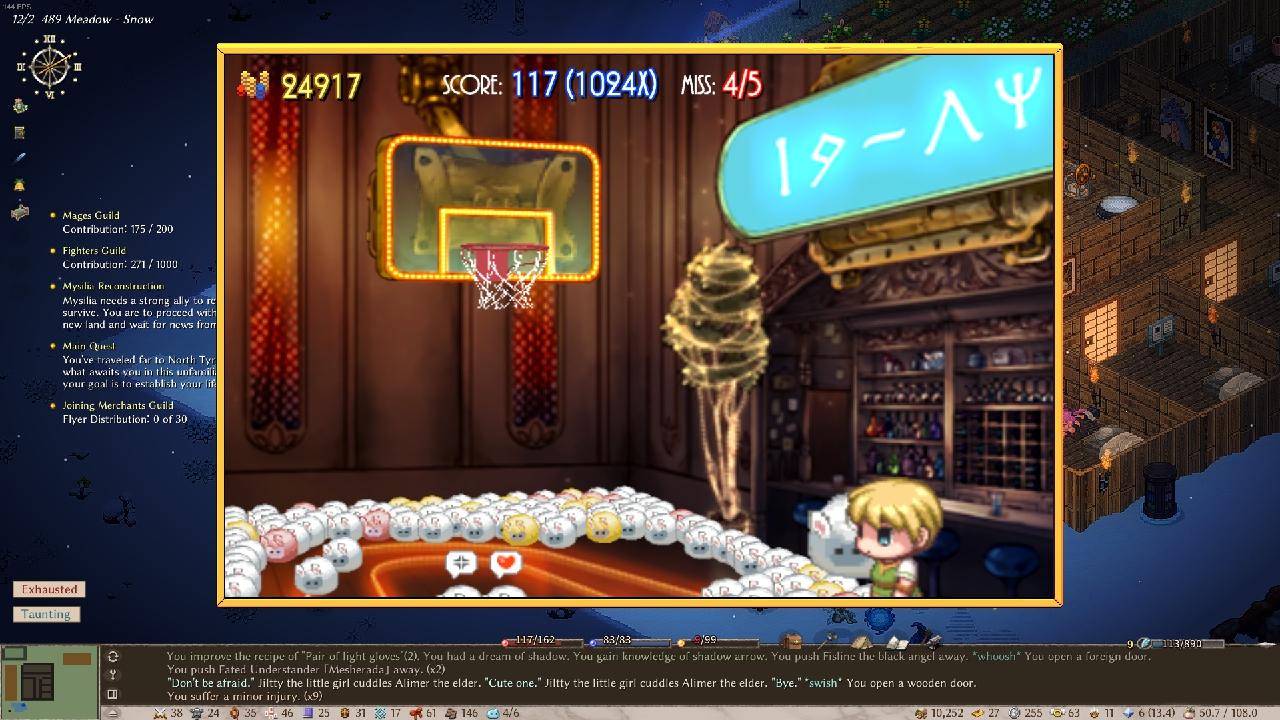
Look at this screenshot for example. | Look at this screenshot for example. | ||
[[File:Mesherada's Elin Guide Image 50.jpg| | [[File:Mesherada's Elin Guide Image 50.jpg|1280x720px]] | ||
For reference, that means I got 117 putits in a row through the hoop (well, technically you can have 4 misses before you have to reset from 0). And at that point where I was, every additional putit in gave me 1024 casino chips (it’s that multiplier next to the score). | For reference, that means I got 117 putits in a row through the hoop (well, technically you can have 4 misses before you have to reset from 0). And at that point where I was, every additional putit in gave me 1024 casino chips (it’s that multiplier next to the score). | ||
| Line 436: | Line 438: | ||
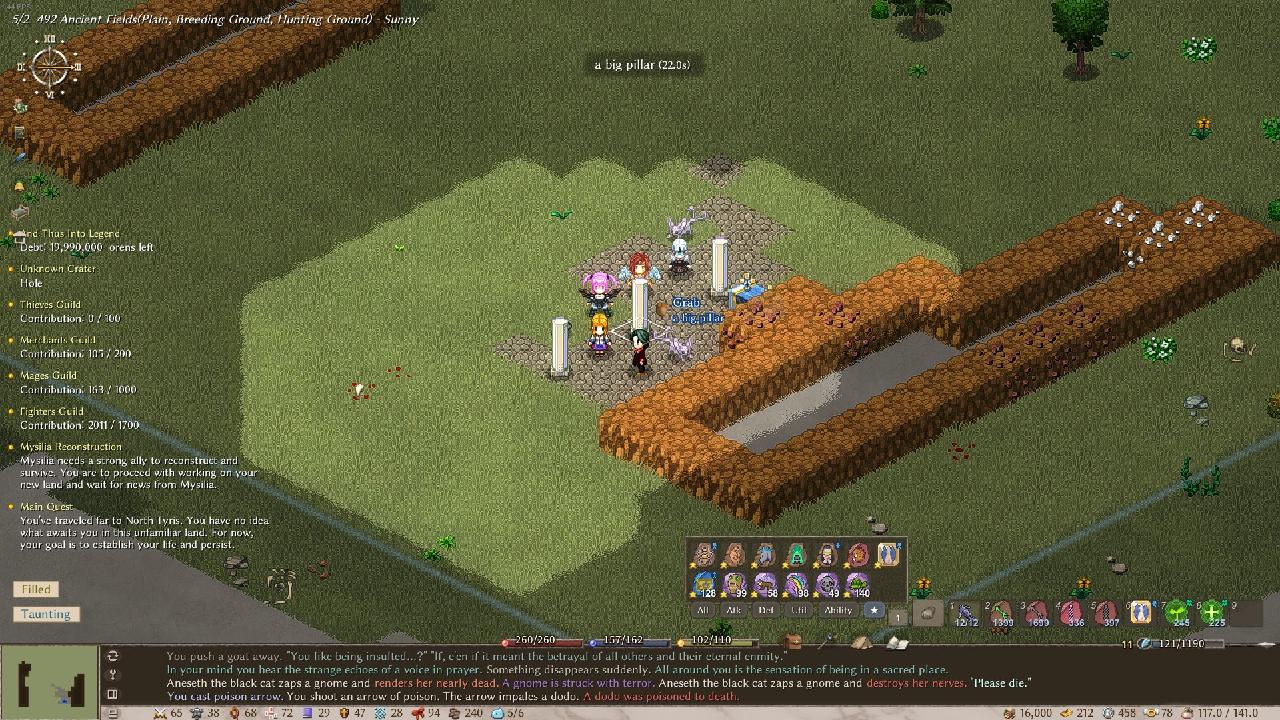
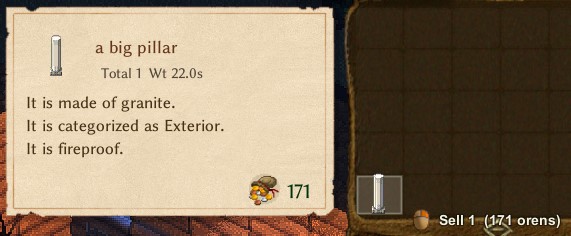
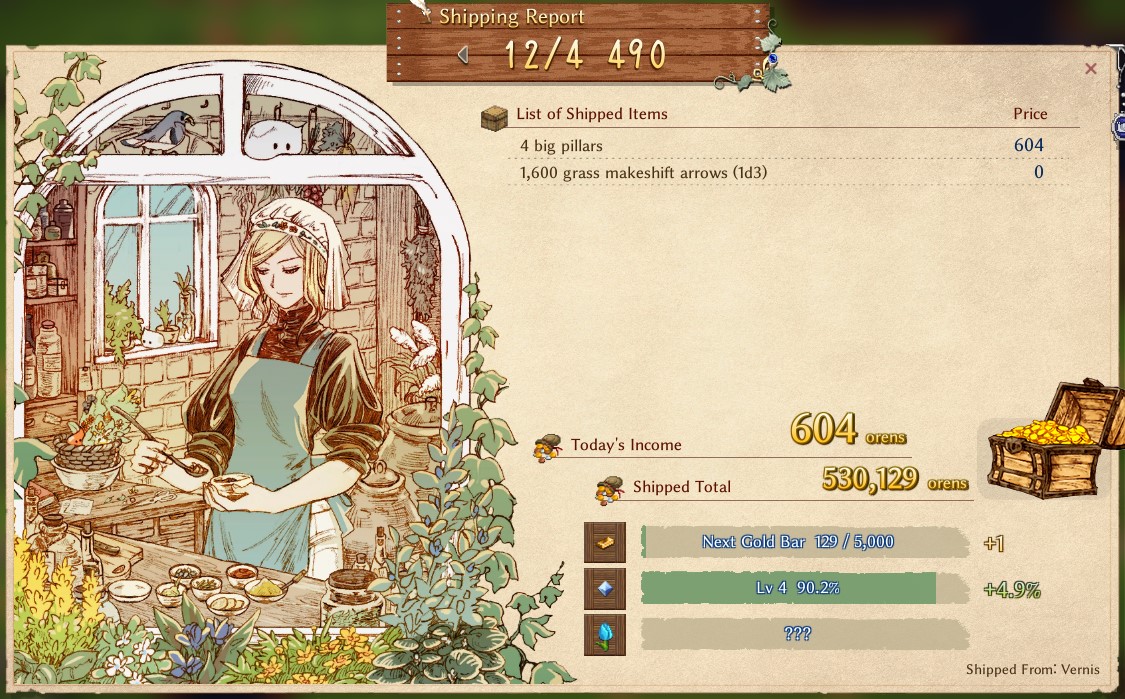
The easiest way when starting out is to explore the wilderness in the overworld until you come across those randomly-generated shrine(?) areas(?). You’ll see an altar surrounded by multiple heavy big pillars. You can lug them back and sell them (or ship them). The reason why this isn’t worth it later on is because it takes time to find these (they’re not rare at all, but they’re not super common either? Just slightly uncommon at worst), and the amount of money really isn’t worth it. By the time you can lug all of them, you can easily make at least 10x that much from a single job request that pays in the couple thousands. And also it’s such a time waster to have to walk back and forth to drop them off and sell them. I say this because you can’t grab them all at once (early on, anyway, which is when these matter more or are more helpful) because above a certain encumbrance level, you get “Squashed” and you can’t move at all. And if you’re “Overweight”, while you can still move, you risk taking fatal damage that can kill you if you’re traveling in the overworld back to your base as you carry these, in which case you risk dropping your money (because death), so… usually, you grab one or two at a time, make the trek back, drop them off, come back, grab 2 more, repeat. It’s a massive waste of time. But this gives you a nice starting amount of money if you’re struggling. | The easiest way when starting out is to explore the wilderness in the overworld until you come across those randomly-generated shrine(?) areas(?). You’ll see an altar surrounded by multiple heavy big pillars. You can lug them back and sell them (or ship them). The reason why this isn’t worth it later on is because it takes time to find these (they’re not rare at all, but they’re not super common either? Just slightly uncommon at worst), and the amount of money really isn’t worth it. By the time you can lug all of them, you can easily make at least 10x that much from a single job request that pays in the couple thousands. And also it’s such a time waster to have to walk back and forth to drop them off and sell them. I say this because you can’t grab them all at once (early on, anyway, which is when these matter more or are more helpful) because above a certain encumbrance level, you get “Squashed” and you can’t move at all. And if you’re “Overweight”, while you can still move, you risk taking fatal damage that can kill you if you’re traveling in the overworld back to your base as you carry these, in which case you risk dropping your money (because death), so… usually, you grab one or two at a time, make the trek back, drop them off, come back, grab 2 more, repeat. It’s a massive waste of time. But this gives you a nice starting amount of money if you’re struggling. | ||
[[File:Mesherada's Elin Guide Image 51.jpg| | [[File:Mesherada's Elin Guide Image 51.jpg|1280x720px]] | ||
[[File:Mesherada's Elin Guide Image 52.jpg]] | [[File:Mesherada's Elin Guide Image 52.jpg]] | ||
| Line 493: | Line 495: | ||
When you grab something very heavy, you’ll get “Squashed” and you won’t be able to move. However, you can also “grab” these heavy things in your inventory and throw them away from you, as long as that area you’re aiming at is lit up. This is immensely helpful because say you have an altar in your base and you’re trying to move it. You can move it around your base by picking it up, throwing it, and repeating this process. | When you grab something very heavy, you’ll get “Squashed” and you won’t be able to move. However, you can also “grab” these heavy things in your inventory and throw them away from you, as long as that area you’re aiming at is lit up. This is immensely helpful because say you have an altar in your base and you’re trying to move it. You can move it around your base by picking it up, throwing it, and repeating this process. | ||
=== Ctrl+F === | === Ctrl + F === | ||
Literally Ctrl+F. Doing this opens up a little menu that lets you search for any item you want that’s in your base. Amazing because it searches for everything, whether it’s in your inventory, in your allies’ inventories, in a storage chest, or even on the floor. You can then click on the item to auto-walk there. Extremely useful because there’ve been a few people who have said they can’t find a god weapon after offering, only to Ctrl+F and find it hidden in the grass somewhere. | Literally Ctrl + F. Doing this opens up a little menu that lets you search for any item you want that’s in your base. Amazing because it searches for everything, whether it’s in your inventory, in your allies’ inventories, in a storage chest, or even on the floor. You can then click on the item to auto-walk there. Extremely useful because there’ve been a few people who have said they can’t find a god weapon after offering, only to Ctrl + F and find it hidden in the grass somewhere. | ||
=== Auto Dumping === | |||
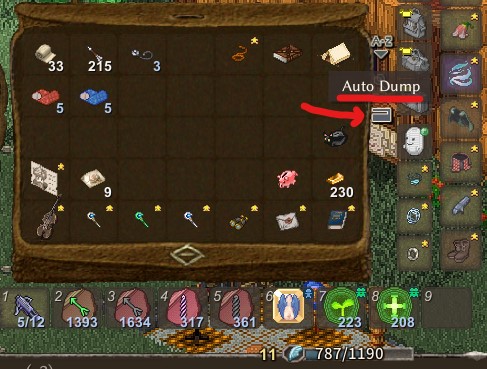
This isn’t so much a “tip” or “trick” as it is just a pointer or reminder that this function exists. If you’ve played Terraria before, it’s like the “Quick Stack” function there. Any items in your inventory that already exist in any current chests in your home will automatically be stored there (your character will move to the appropriate chests). For example, if I have a storage chest to store wood stuffs (logs, sticks, etc.), one to store stone stuffs (stones, ores, etc.), and various other chests (potions, scrolls, etc.), when I click “Auto Dump”, I’ll automatically deposit everything I have in my inventory into the appropriate chest as long as there’s another copy of it in there already (great when you just cleared a Nefia, or went out and gathered a bunch of resources). | |||
[[File:Mesherada's Elin Guide Image 77.jpg]] | |||
=== Melilith (SPOILER AHEAD) === | === Melilith (SPOILER AHEAD) === | ||
| Line 501: | Line 508: | ||
When you do the “Cursed Manor” DLC quest, make sure you pay attention to the fact that you can only grab one item from the treasure room. Make sure you also fully explore the room and grab the “'''★Ticket to become Melilith’s friend'''”, NOT the rod of wishing. Also, aside from the fact that she’s worth more than any wish you could make (imo), the storyline is just so sweet and heartwarming if you choose her. | When you do the “Cursed Manor” DLC quest, make sure you pay attention to the fact that you can only grab one item from the treasure room. Make sure you also fully explore the room and grab the “'''★Ticket to become Melilith’s friend'''”, NOT the rod of wishing. Also, aside from the fact that she’s worth more than any wish you could make (imo), the storyline is just so sweet and heartwarming if you choose her. | ||
=== Harvest Season job requests (the Harvest Time quests from Elona) === | === Harvest Season job requests (the ''Harvest Time'' quests from Elona) === | ||
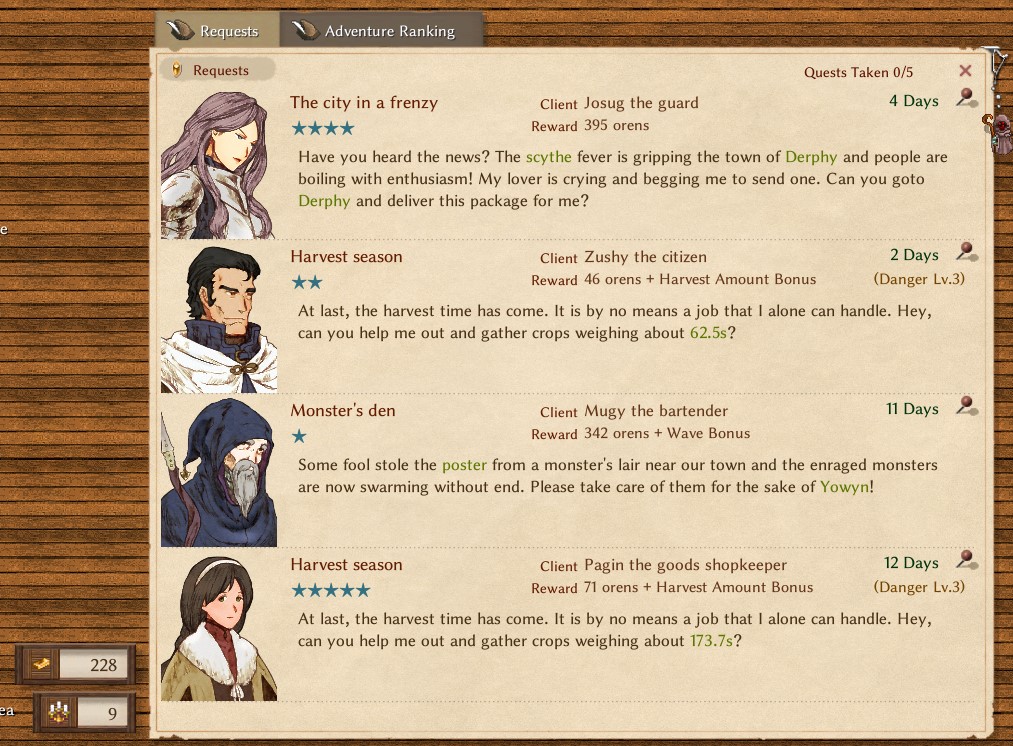
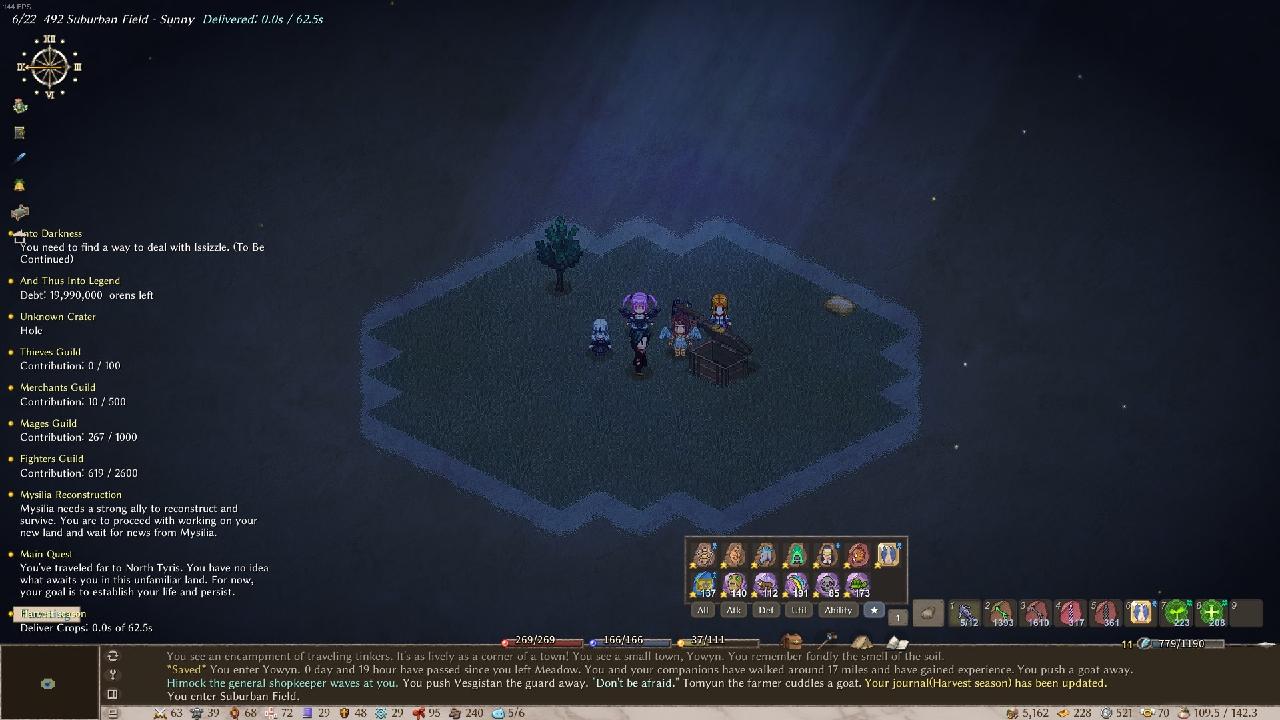
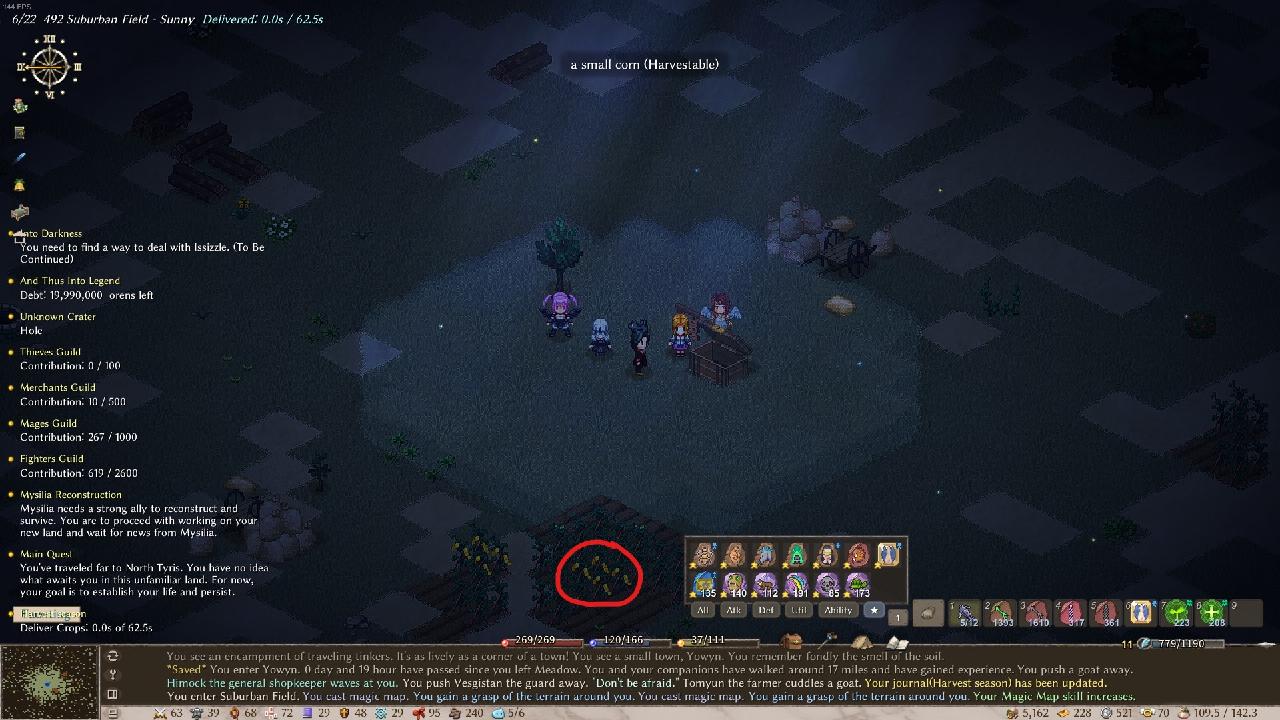
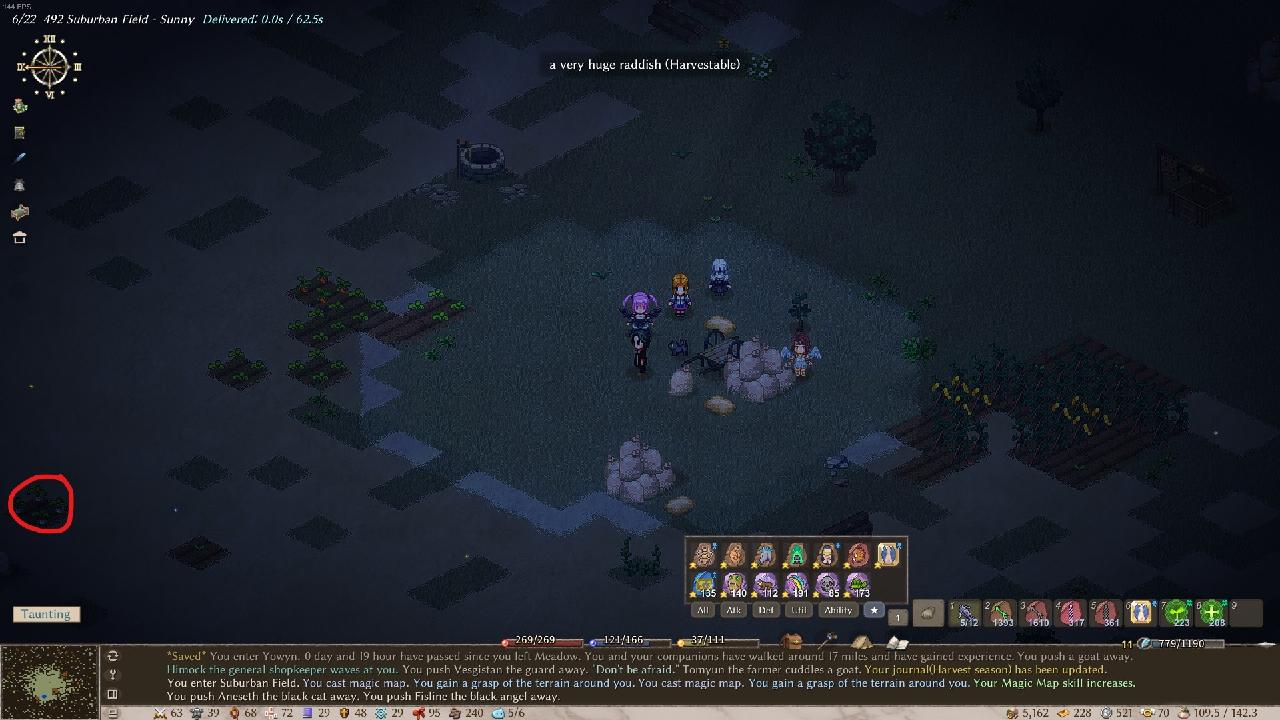
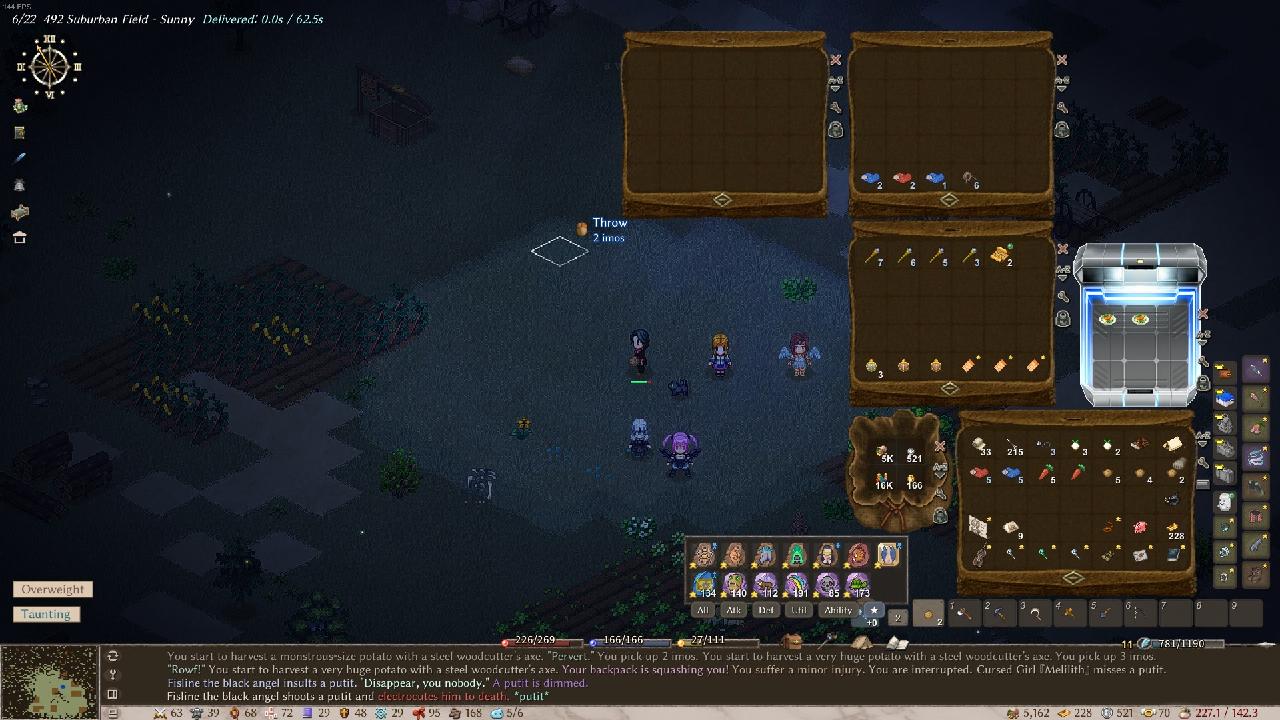
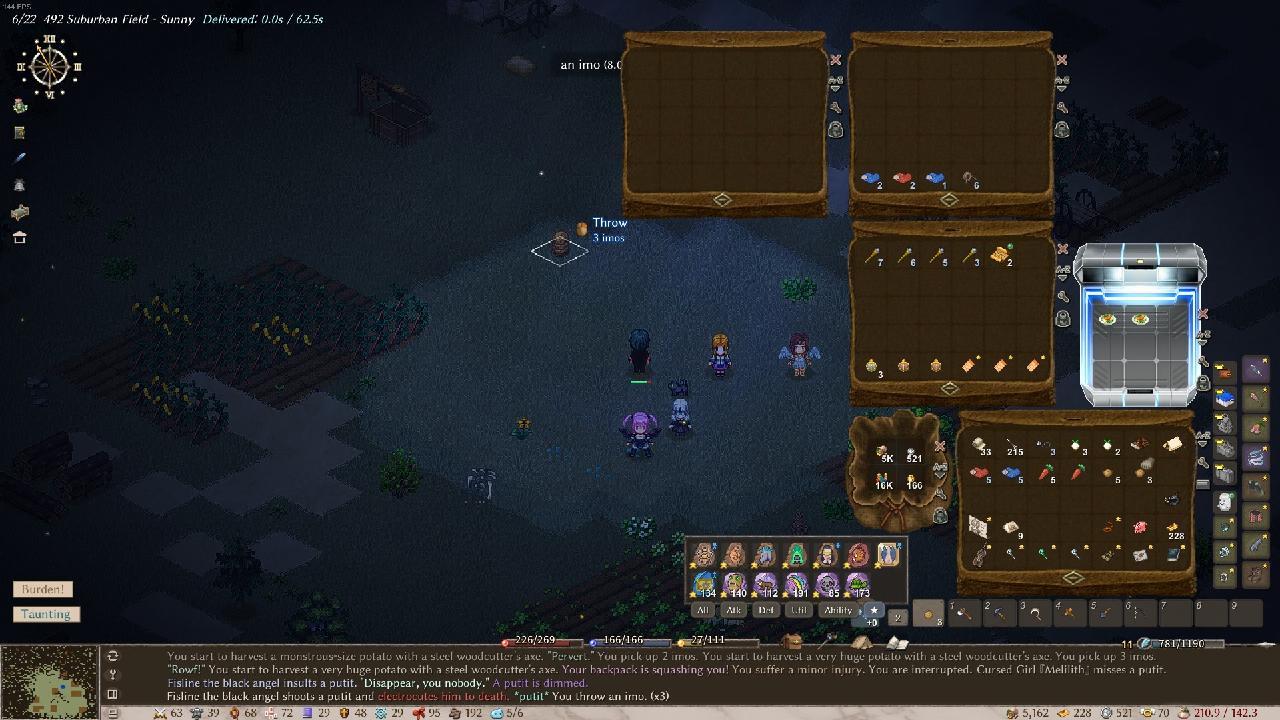
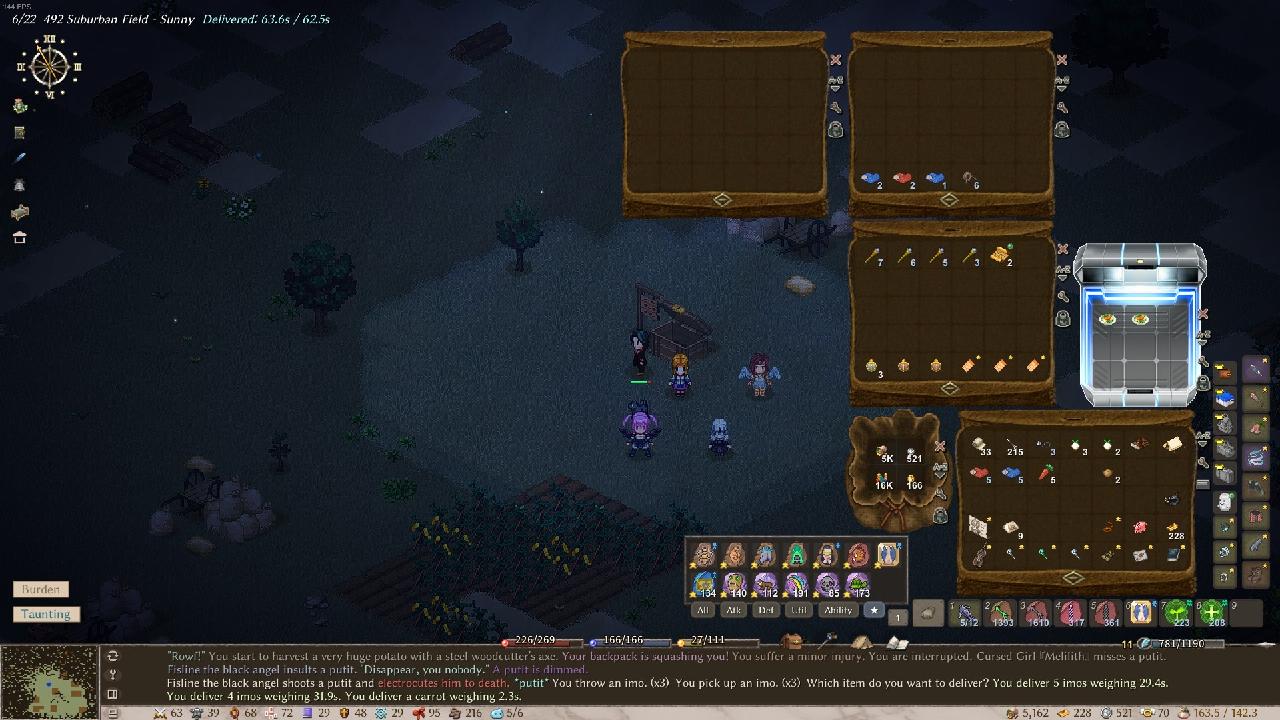
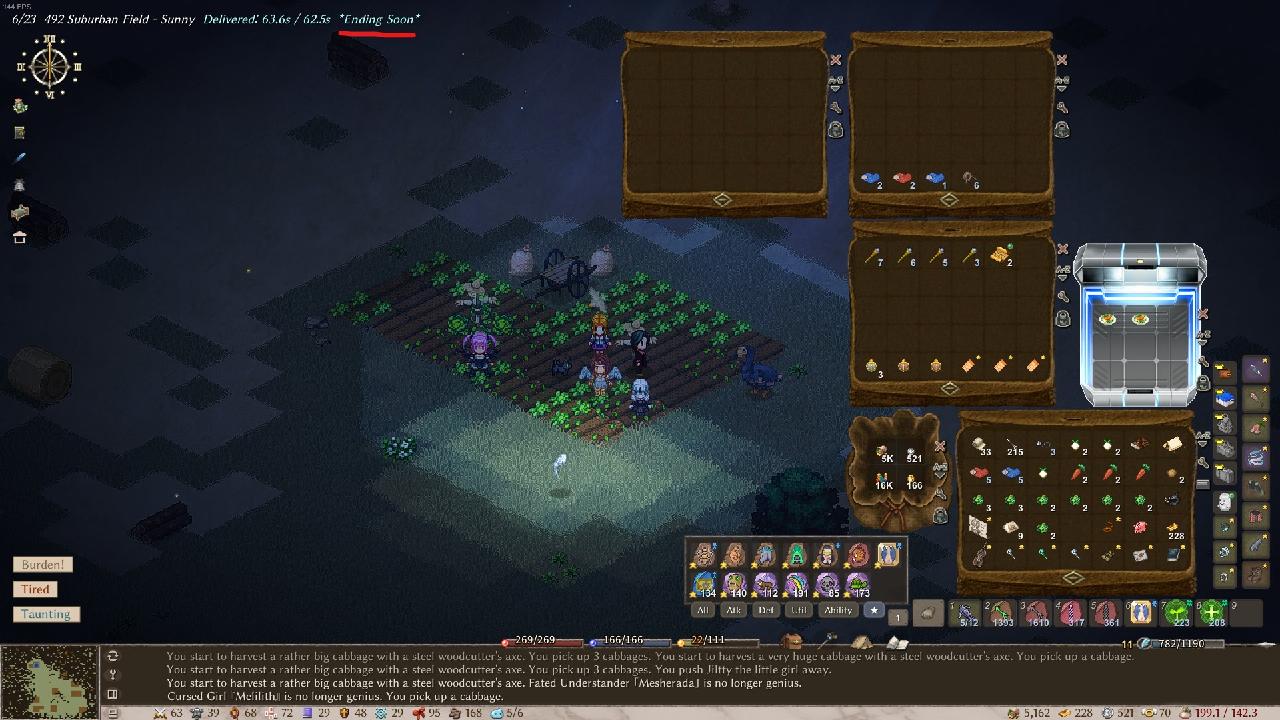
The famous job request that has you gathering a bunch of crops to meet a quota while you’re on a timer makes a return once again in Elin. This whole section is especially picture-heavy (just because I wanted to explain how it looks on my end, especially after I use Magic Map, look around with my cursor, throw the crops, etc.). It’ll be hard to read the tips and tricks while they’re so interspersed between all the pictures though, so I’ll just talk about and describe everything first here and then show all the screenshots together afterward. | The famous job request that has you gathering a bunch of crops to meet a quota while you’re on a timer makes a return once again in Elin. This whole section is especially picture-heavy (just because I wanted to explain how it looks on my end, especially after I use Magic Map, look around with my cursor, throw the crops, etc.). It’ll be hard to read the tips and tricks while they’re so interspersed between all the pictures though, so I’ll just talk about and describe everything first here and then show all the screenshots together afterward. | ||
| Line 508: | Line 515: | ||
When you walk over the crops you threw, you’ll automatically pick them up (default settings if I recall correctly), which is great, but also it’ll probably instantly “Squash” you and you won’t be able to move. So… just throw all of your crops in the direction of the box again (just do this until you get to the “Burden!” status). And go to the next plot or whatever. But don’t get greedy though. When you see that your time is running out (on the top-left of your screen it’ll say *Ending Soon*), start heading back throwing the produce and all that. Because it will take time to throw the crops, walk over, pick them up, repeat, etc. | When you walk over the crops you threw, you’ll automatically pick them up (default settings if I recall correctly), which is great, but also it’ll probably instantly “Squash” you and you won’t be able to move. So… just throw all of your crops in the direction of the box again (just do this until you get to the “Burden!” status). And go to the next plot or whatever. But don’t get greedy though. When you see that your time is running out (on the top-left of your screen it’ll say *Ending Soon*), start heading back throwing the produce and all that. Because it will take time to throw the crops, walk over, pick them up, repeat, etc. | ||
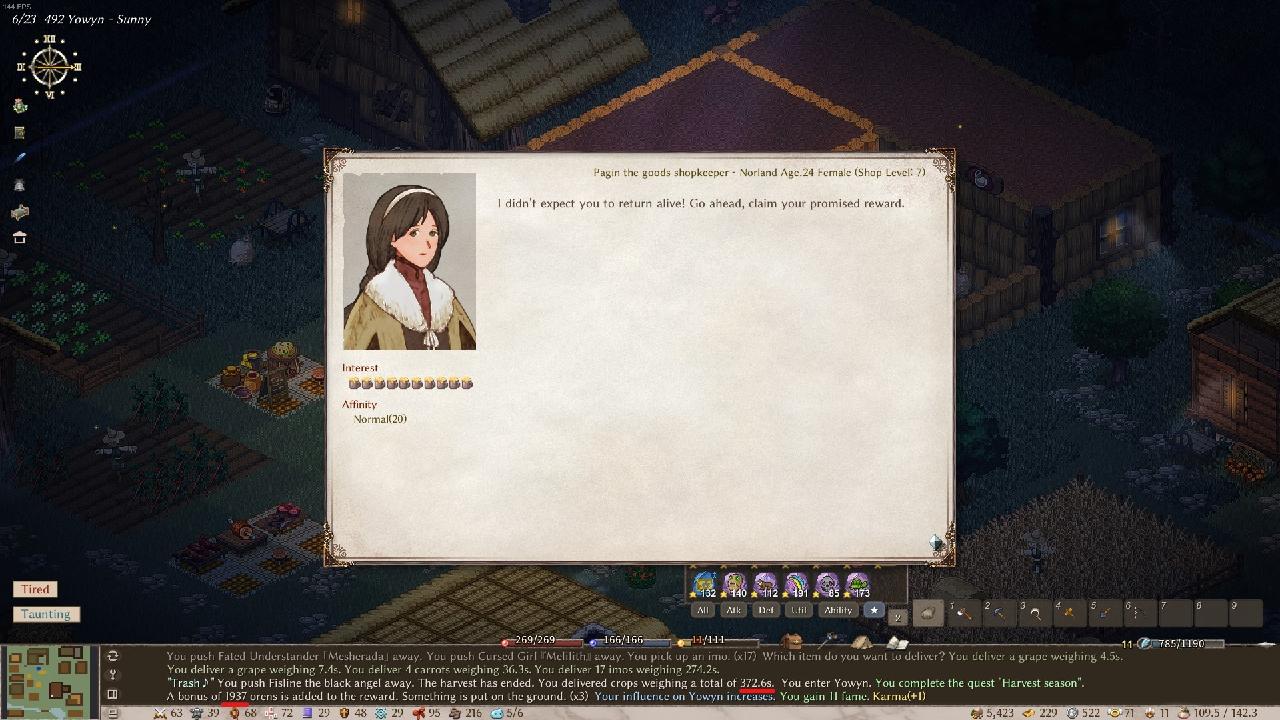
The next tip/trick is after you’ve met your quota. While you do get a bonus for over-gathering and delivering, it’s also based on the quota (a higher quota, or more difficult harvest | The next tip/trick is after you’ve met your quota. While you do get a bonus for over-gathering and delivering, it’s also based on the quota (a higher quota, or more difficult harvest request, gives you a higher bonus for over-gathering/delivering). So typically, I start with the easiest/lightest quota and move toward the harder ones (if multiple are present on the quest board). And the moment you see the *Ending Soon*, if this is one of the lower quota requests, deliver just enough to meet the quota. With the rest of the crops in your inventory, split them up (if you’ve forgotten, Ctrl + click) like I did in one of the screenshots. (I split them into stacks of 2 because splitting them all into individual ones is way too much effort.) | ||
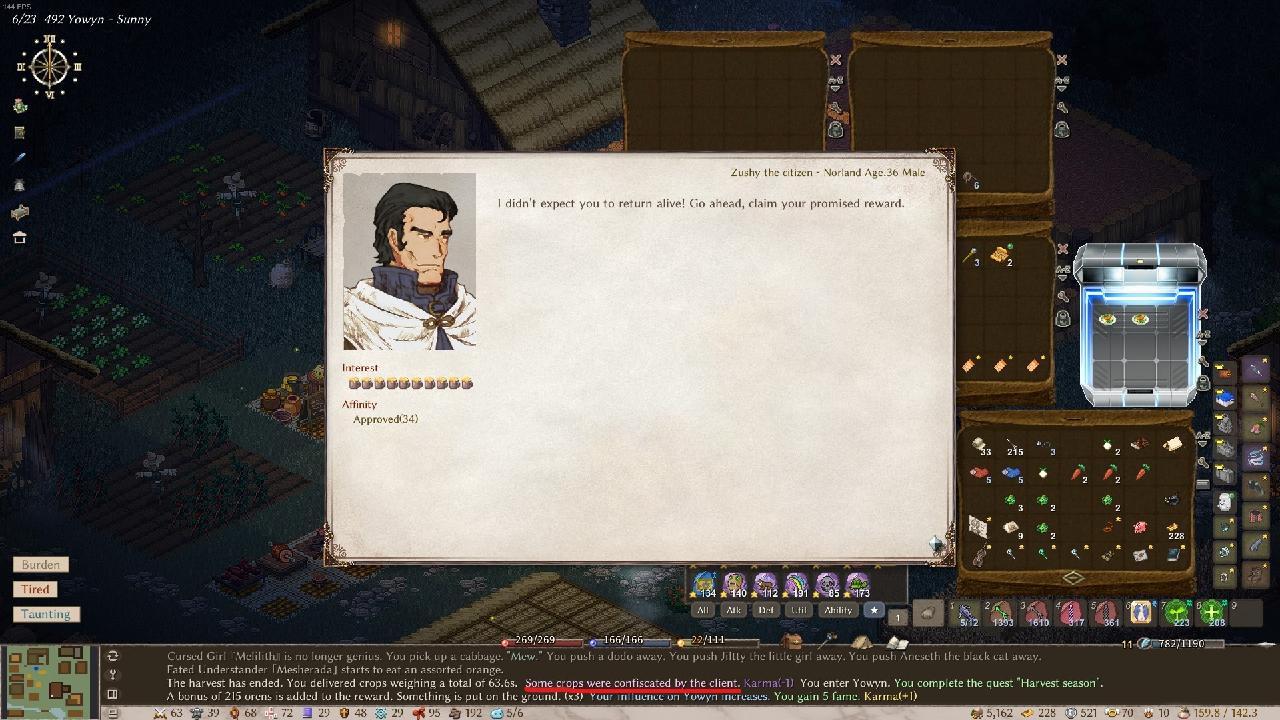
Once time runs out and you’re booted out, the client will usually catch you and confiscate some of the crops (you lose -1 karma for getting caught, but since you gain +1 karma for completing the request, nothing actually changes). But note that you only lose stacks of crops | Once time runs out and you’re booted out, the client will usually catch you and confiscate some of the crops (you lose -1 karma for getting caught, but since you gain +1 karma for completing the request, nothing actually changes). But note that you only lose stacks of crops, which is why if you have everything in a single stack, you risk losing that entire stack (especially if it’s like 10 or more crops together). | ||
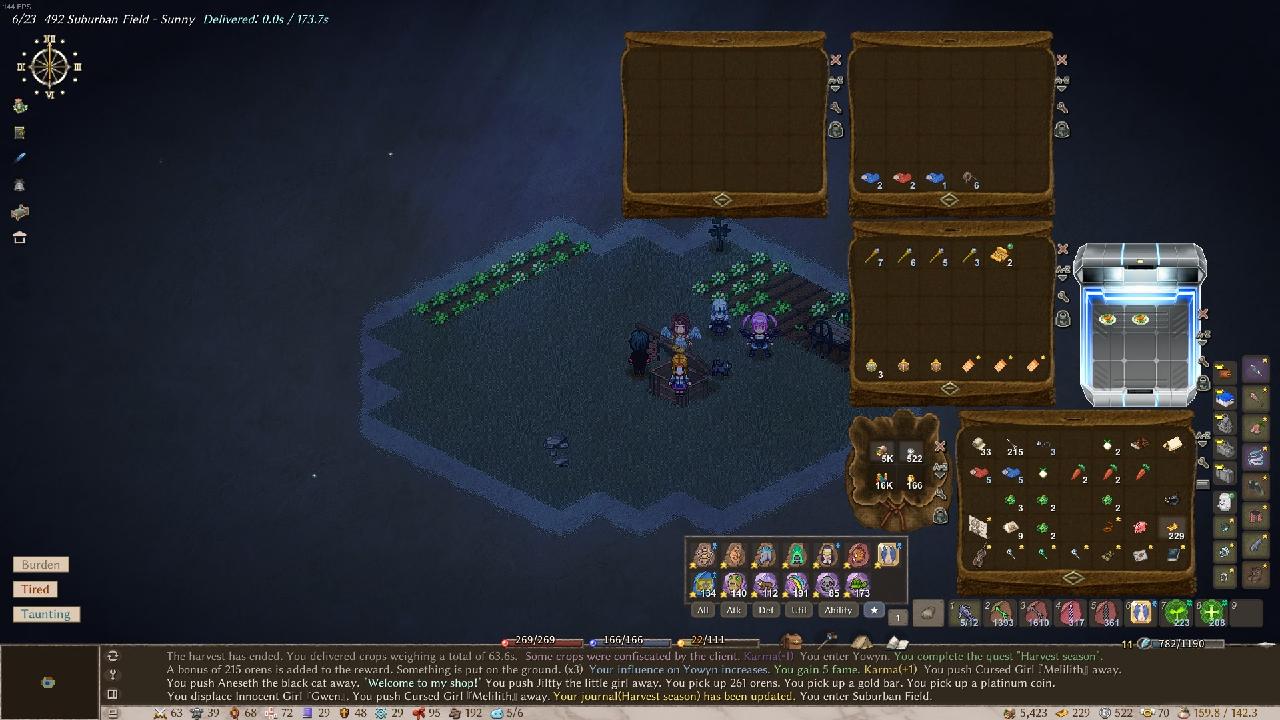
Then start the next harvest | Then start the next harvest request, and you can carry in all of the crops you gathered from the last job. (Refer to the second-to-last screenshot where I just entered the next quest but I already have a bunch of vegetables at the ready.) Which you can instantly deliver for a boost to your initial quota, and repeat! | ||
(You can refer to my last image for an example of how this can play out. Note from the first picture in this section that I had | (You can refer to my last image for an example of how this can play out. Note from the first picture in this section that I had job requests for 62.5s and 173.7s. But I played around delivering for the higher quota, and I got that massive bonus payout.) | ||
[[File:Mesherada's Elin Guide Image 66.jpg]] | [[File:Mesherada's Elin Guide Image 66.jpg]] | ||
[[File:Mesherada's Elin Guide Image 67.jpg| | [[File:Mesherada's Elin Guide Image 67.jpg|1280x720px]] | ||
[[File:Mesherada's Elin Guide Image 68.jpg| | [[File:Mesherada's Elin Guide Image 68.jpg|1280x720px]] | ||
[[File:Mesherada's Elin Guide Image 69.jpg| | [[File:Mesherada's Elin Guide Image 69.jpg|1280x720px]] | ||
[[File:Mesherada's Elin Guide Image 70.jpg| | [[File:Mesherada's Elin Guide Image 70.jpg|1280x720px]] | ||
[[File:Mesherada's Elin Guide Image 71.jpg| | [[File:Mesherada's Elin Guide Image 71.jpg|1280x720px]] | ||
[[File:Mesherada's Elin Guide Image 72.jpg| | [[File:Mesherada's Elin Guide Image 72.jpg|1280x720px]] | ||
[[File:Mesherada's Elin Guide Image 73.jpg| | [[File:Mesherada's Elin Guide Image 73.jpg|1280x720px]] | ||
[[File:Mesherada's Elin Guide Image 74.jpg| | [[File:Mesherada's Elin Guide Image 74.jpg|1280x720px]] | ||
[[File:Mesherada's Elin Guide Image 75.jpg| | [[File:Mesherada's Elin Guide Image 75.jpg|1280x720px]] | ||
[[File:Mesherada's Elin Guide Image 76.jpg| | [[File:Mesherada's Elin Guide Image 76.jpg|1280x720px]] | ||
== Conclusion and agenda-plugging == | == Conclusion and agenda-plugging == | ||
| Line 546: | Line 553: | ||
So yeah, thanks for reading! And please help share this guide so other Elin players can get ready for EA and enjoy the game when they start! | So yeah, thanks for reading! And please help share this guide so other Elin players can get ready for EA and enjoy the game when they start! | ||
Also, here’s cute picture that’s perfect if you’re like, “What do I do in this game?” “It’s too hard.” “I’m feeling overwhelmed and lost.” “I want to leave a bad review on Steam.” | |||
[[File:Mesherada's Elin Guide Image 78.jpg]] | |||
=== Agenda === | === Agenda === | ||
If you’re also okay with it, I’d like to plug in my agenda here too! I guess… this matters to me because I’d like for people to set their expectations of this game straight. This, in particular, is directed to the Sseth crowd. So yes, it’s a very anti-Sseth agenda. Please read it here if you’re so inclined. If not, you don’t have to either! | If you’re also okay with it, I’d like to plug in my agenda here too! I guess… this matters to me because I’d like for people to set their expectations of this game straight. This, in particular, is directed to the Sseth crowd. So yes, it’s a very anti-Sseth agenda. Please read it here if you’re so inclined. If not, you don’t have to either! | ||
'''Agenda: [[User:Mesherada/Agenda|User:Mesherada/Agenda]]''' | '''Agenda: [[User:Mesherada/Agenda|User:Mesherada/Agenda]]''' | ||
Revision as of 21:43, 22 October 2024
Introduction
I backed the game at a tier where I could start playing from day 1 in like, pre-alpha (which was way back in like December of 2023), so I was fortunately able to slowly learn it alongside everyone else in Discord and gradually pick up tips and tricks along the way. This helped make learning about the game a lot more manageable for me since not only were all of us progressing through the game together and discovering and learning all its mechanics, I’d also get to follow and understand all the individual patches/updates as they were rolled out and changed things up (and after each update, for example, all of us in Discord would be discussing what changed and what that meant or how it’d affect us). And so along with all of that, I’d like to consider myself a bit more well-informed thanks in no small part to everyone else’s help too! This would probably be in contrast to players jumping into the game at EA and who are suddenly flooded with a bunch of mechanics and knowledge and the questions of “What to do?” or “How do I do this?” while playing the catch-up game.
I’m not going to say there isn’t a huge learning curve, because imo there is one (albeit not as bad if you have any Elona background), so here’s this guide that’s my way of… contributing to the amazing Elona/Elin community! And also to just share some of my knowledge and experiences from my (currently) ~440 hours of pre-EA Elin gameplay to help newer players not feel like, “Boo bad game, too complicated, I’m done” before they’ve really experienced even a fraction of what the game has to offer. I’m honestly not as hardcore as some of the other players in Discord (and I still turn to them frequently for help), so think of this as… maybe a more friendly guide for newbies too! Where I might be able to better understand and see things more from a newer player’s perspective! But also, I’m going to cover a lot of obvious things—so obvious that some people might facepalm and ask why I’m covering such topics—to which I say, just look at some of the questions on the Steam Discussion boards or on Discord. That should be proof enough.
One thing to note, though, is that this guide is extremely tailored toward my own playstyle, so while I hope it’ll help, keep in mind it’s very “me” and I’ll be somewhat biased in various places, I’m sure. Emphasis on this bit, because it’s based on how I play the game, whether it’s settings, UI, gameplay focus and priorities, etc. Also this guide is up-to-date as of version Beta 22.93.
Also check out other guides on this Wiki or ask other people for help on Discord (which I'm pretty sure is the most popular space for Elin discourse) too!
Controls
Why this section? Mouse to move around, WASD to move around, arrow keys to move around, right?
If you Ctrl + click something that’s in a stack in your inventory, you can split it. Then, you can either drag the slider if you don’t care about being accurate (like, say, you just want to dump some excess weight temporarily), or manually type in the number to split and get that specific amount of whatever (say, if you want to deposit a certain amount of money at the banker NPC or give an ally a specific amount of money for training purposes, but more on this latter point later).
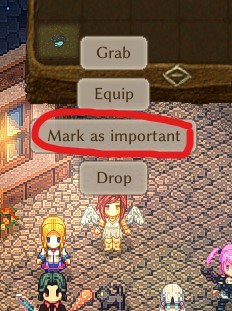
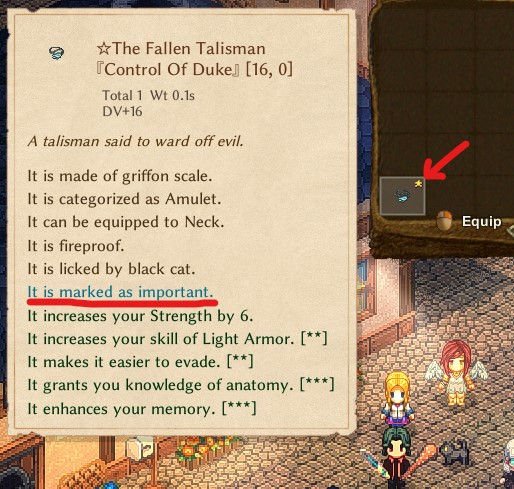
Something else I'll mention to add to this section is that in the settings, I personally enable “Double click to hold an item in inventory” (and disable “Hold middle mouse button to hold an item in inventory). I do this because instead of M3 (clicking with the mouse wheel), double-clicking is much more intentional. “Grabbing” things in this game is extremely important and you do it for so many things like using ranged weapons (bows, guns), throwing items or weapons (like panties), placing furniture, using furniture tickets, etc. (more on all of this later, no worries). M3 is a lot more useful for the various other interactions with items, like marking something as important or interacting with allies to give them equipment or food. (Again, this is a personally-me thing; you don’t have to do it.)
The control (Ctrl) key by itself is also extremely important. It swaps between your two hotbars on the bottom-right of your screen (well, my screen; I don’t know how it is for you). I use my hotbar 1 for combat, while hotbar 2 is for lifeskills (aka the “slow life” content, whether that’s cutting down trees, digging and mining, farming, etc.).
For both hotbars, you see that hand icon right? Let’s call that the… “active box”. It displays whatever’s active (whatever you’re grabbing or that you’re preparing to do), whether it’s using a tool or casting a spell.
Since we’re on this topic, you can drag things to your hotbar. Clicking things in your inventory picks them up (this is different from “grabbing” them, which is double-clicking for me like I said), and you can drop them in your hotbar. So in my hotbar 2, if I pushed “1”, I’d “grab” the axe. If I pushed 2, I’d “grab” the pickaxe.
I could then use them by right-clicking the tree or wall or whatever. I know I’m grabbing them because they would appear in my active box, and my character would also hold it. It’s a bit different with spells, so I’ll address that next. Oh, and by the way, pushing “q” un-grabs whatever you’re grabbing. It “clears” the active box.
Spellcasting and using abilities
To cast spells, just right-click them in your “ability menu” (default “b” key). Some things automatically activate, so like if I right-clicked “Magic Map” on the bottom-left there, it’d instantly cast.
If I right-clicked “Slow” on the bottom-right, however, it’d appear in my active box and I’d need to select a target to cast it on.
And with hotbars? You can also click and “pick up” spells/abilities from your ability menu to drag and drop them into your hotbar. So now, when I push “2”, “Poison Arrow” is now in my active box and I can cast it on my target; if I wanted to swap to “Chaos Bolt”, I could push “4” and instantly swap spells. It’s much more convenient than having to find the spell or ability somewhere in the ability menu and then right-clicking it, and then right-clicking on the target, and then repeating this process if you wanted to cast multiple spells. This is best for frequently-used spells/abilities though, since you only have 9 slots on your hotbar. Oh, and “q” clears the active box, so you’d stop “prepping” the spell (for example, if you don’t want to miscast on an ally or NPC).
Using ranged weapons and throwable weapons
You probably see that I have a crossbow in my “1” slot. There’s actually no ranged weapon slot in Elin. To use a ranged weapon, you have to “grab” it (by double-clicking in your inventory) and then aim at the target. This gets a bit tiresome and repetitive if you’re a (cross)bow or gun player, so you can drag the ranged weapon into your hotbar too. This is the same for thrown weapons too (panties for example). Drag the weapon/throwable into your hotbar, and when you push the appropriate key, it’ll appear in your active box, you’ll “grab” it, and you can fire or throw it or whatever.
Tutorial
Honestly, refer to Hachi’s guide here: User:Hachimitsu/EarlyGameBeta. It should be pretty self-explanatory in-game, but if you’re lost, refer to his guide. I’m not really going to delve into things he’s covered already.
Oh, but to start out and create a “Workbench”, like we’ve covered earlier, you’d go to the ability menu, right-click “Quick Craft”, and proceed from there.
Exhaustion/meditation
A major mechanic in the game is stamina. It’s the yellow bar next to your hp/mp bars. It limits how many actions you can do/perform before you need to rest up.
When you first start out, your stamina is extremely limited. You may only get to chop down a few trees or whatever before you’re “Tired” (low stamina), and then “Exhausted” (no stamina). Performing actions that consume stamina while you have no stamina (or that would bring you below 0 stamina) causes you to take damage equal to how negative your stamina would be (I think?). So if your stamina is 0 and you do something that would drain 1 stamina, you’d take 1 damage. If you’re not paying attention and your stamina is -10, and you perform an action that would take 10 stamina? You’d take 20 damage and drop to -20 stamina. Kinda like seen here with this guy. Don’t let your name appear in the Palmia Times’ death logs. Everyone can see it.
To recover stamina, go to sleep. You don’t have a bed when you start out, so just “Meditate” (ability menu). You’ll just knock out and fall asleep on the floor. I also doubt you’ll fully recover all your stamina, because your sleep was so poor (unsurprising since you’re sleeping on the floor). Eventually when you craft a bed, you can sleep on the bed to recover more stamina. As you progress through the game though, you’ll usually have more than enough stamina for an entire Nefia (dungeon) dive. Instead, meditating’s primary purpose becomes mana recovery (you recover mana faster when you meditate).
So yeah. You always fall asleep when you meditate while tired or exhausted. You also recover mana faster when meditating.
Feats
Since we’re talking about meditating and sleeping, good segue to talk about feats.
Refer to this Wiki page: Elin:Feats
Here, I will say what feats are, imo, must-haves. But this section also depends on your planned playstyle/build, so if you’re planning on forgoing spellcasting completely, you can skip “Dream Waker”, for example.
Dream Waker: When you fall asleep, you will get spell stock based on your “domain”. Important because when you cast a spell, you consume 1 spell stock (from that spell). If you run out of spell stock, you can’t cast that spell anymore. So this is how you sustain your repertoire of spells (aside from reading spell books). (Btw, “domains” are basically spell “elemental types” like fire, cold, and lightning, and the domains you choose or start with affect what spells you get while sleeping with the Dream Waker feat and also offensive spells of your domain(s) will spawn more frequently as loot and as spellbooks in shops). Dream Waker’s a 10/10 if you ever plan on casting spells.
A “spellbook reservation service” was added to the game in version Beta 22.87; this is very similar to the “spell writer” NPC in the Mages’ Guild in Elona that you might be familiar with. This NPC’s locked behind a quest, but he lets you reserve anywhere from 3-10 spellbooks based on your level of investment in his shop. This is another way of sustaining your repertoire of spells, though it’s recommended you give him spellbooks not from your domain (since your domain-related offense spells can be sustained through Dream Waker).
Gourmet: Absolute must if you ever plan on cooking your own food. It lets you see all the various effects foods can have. It also lets you add a seasoning to some foods, which is big. Honestly a 10/10; imho everyone should grab this.
Model Follower: You automatically pray at the end of the day if you haven’t already (it’s automatic and you’ll pray even if you’re in the middle of sleeping lol). Praying, btw, gives you Faith exp. Faith is important because you eventually get things like your god’s pet (an extremely powerful follower) or god’s weapon based on your Faith level. 10/10 if you ever plan on worshiping a god.
Master Sleeper: You recover more stamina when you sleep. You also have a higher chance of learning new recipes when sleeping. Pretty important. 9/10.
Scavenger: When you gather things from gathering spots, you can get better stuff. Also getting stuff from disarming traps. Pretty nice! 8/10.
Skills
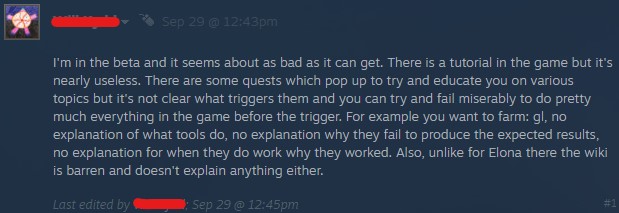
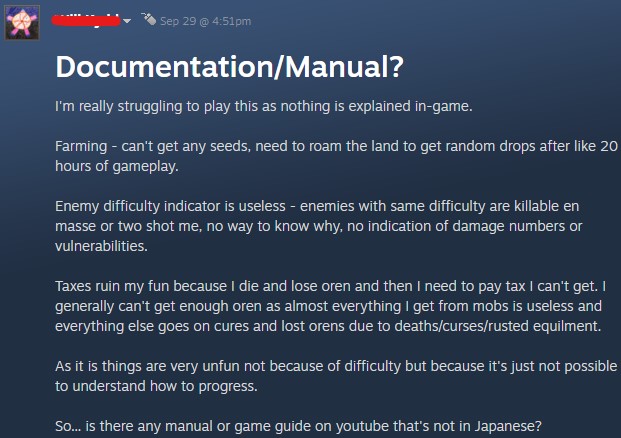
Why do I have this section? It’s because I saw someone on the Steam Discussion boards complaining about this.
Yes, it’s the same person as the one I showed at the start who was complaining about literally everything. That’s why I’m covering such obvious topics, from skills to feats to even controls.
...
Skills are what let you do craft certain things proficiently (Carpentry, Blacksmith, etc.), let you do certain lifeskills and actually get better at them (Farming for more powerful seeds/plants/crops, Music for better performances, Cooking for better food recipes), and even improve your combat hit chance and damage (Tactics for melee damage, Eye of Mind for crit chance, Short Sword for short sword hit chance, etc.).
A nice improvement in Elin over Elona is that there is a base potential you can’t drop under: it’s 100. This means that you will never get no exp, not even negligible exp, for using a skill (assuming you’ve learned it); you’ll always get a pretty decent and appropriate amount of exp for using that skill. I could choose to never train my Cooking skill and by cooking enough food, I’d eventually level it up (at a decent-enough pace I guess). However, when you complete job requests (or do Nefias), you get platinum coins. You can spend these at trainer NPCs to raise your skills’ potentials (or to learn a brand-new one if you haven’t learned it already). You can find trainers in town by talking to any guard and asking them to point you to one.
Refer to this Wiki page: Elin:Skills
Raising your skills’ potentials lets you get more exp from using them (oh, you can see your potentials by hovering over the skills). When the skill levels up, the potential will drop some amount.
Attributes
Attributes are pretty important. If you use skills that belong in each attribute, it’ll train that attribute and eventually it’ll level up. So if I wanted to train/level up my Endurance attribute, I could just chop down trees on repeat. You can also train attributes by using weapons that correspond to that specific one. So to train Strength? Fight with a long sword.
Refer to this Wiki page: Elin:Attributes
To raise your attributes’ potentials (you can see them by hovering over the attributes), however, you have to eat foods that provide that potential.
Refer to this Wiki page: Elin:Food
More on this later in the “Foods” section.
Builds/playstyles
Honestly, they’re all viable. This is like, such an open-world, sandboxy game that you’re not really constrained to using a specific weapon or playing in a specific way. You can use only spells and that’d work. You can also exclusively use bows or guns or whatever ranged weapon you want and that’d work too. There was even a player on Discord who went as a martial artist whose only method of fighting was bumping into enemies (essentially punching them). And so we called him a “bump martial artist”. It’s completely viable of course, and it worked for a while! (I think he terminated that run for a reason unrelated to his build. But anyway…)
Because this game isn’t anything like Path of Exile or other games where you only have a certain amount of skill points or whatever, you can literally build whatever you want. The only “cost” is time, since you have to start training the new skill or weapon or whatever for your new build from base. But you do have essentially infinite feat points (as far as I know), infinite levels (as far as I know), and things just… scale to infinity. Only issue is time IRL.
In the Discord, there’s a command we use: !dys. It basically means “double your stats”. If there’s a problem, any problem (whether it’s combat or lifeskills or whatever), it can usually be solved by doubling your stats. By grinding more. “Double your stats, halve your problems.” If you’re fighting a boss and it chunks your hp to -100 (and obviously you die)? (This can happen in the infinitely-scaling Void.) Just keep grinding and double your stats to the point where your hp will now stay positive even after that chunk.
So the bump martial artist from earlier? His only problem was he didn’t !dys enough. He could’ve approached One Punch Man territory if he really wanted to lol. And as for me, for example? I’m a Hillfolk (dwarven) Thief. And I dual-wield a short sword with a mace. Because it lets me fight like the Witch-king of Angmar (from The Lord of the Rings). Lol. And aside from those two main weapons, I primarily cast poison/darkness/chaos spells (mainly because of my domains, unfortunately), with 95% of the offensive spells I use being Poison Arrow and the other 5% being Chaos Bolt (for the penetrating cc). I also supplement all of this with debuffs, so for elite monsters or bosses, I usually give them the whole slew of debuffs first (Silence, Weakness, Elemental Scar, Bane, Slow) before whacking them with my short sword + mace and spamming Poison Arrow + Chaos Bolt. And I guess 1% of the time, I use my crossbow because following Lulwy gives me such a massive boost to my Crossbow (and Bow) skills that it’s still higher level than my Short Sword and Mace skills. (And I give all of my good bows to my Black Angel, which leaves me with the crossbow. xd)
Any build can and will work (probably.) The only question is, are you willing to put in the work and !dys?
Pets/allies
Pets/allies are great. You can play a solo build and run with the “Lonely Soul” feat, but you’re missing out on a lot. Allies can provide so much more utility beyond the stat gains from Lonely Soul.
Some allies can heal you, others can debuff the enemies, and yet others do massive amounts of boss-killing damage. And some can taunt/tank the enemies, letting you safely fight from afar. I personally run with 5 allies (my main 5 of Mesherada, my starter little girl, Melilith, Ehekatl’s Black Cat apostle, and Lulwy’s Black Angel apostle ❤️), for example, and I’m currently comfortably clearing level 70 Nefias. (I could have more allies, but I take the RP/isekai aspect of the game kind of seriously, so these are the main 5 that I love and I’m happy with. Kind of why I don’t eat any little ones/little sisters for their ADAM, since… I couldn’t. I could never lol.)
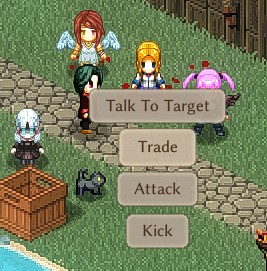
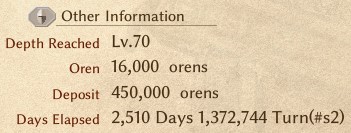
You do have to take care of your allies though, and one of the first ways is by appropriately gearing them up. If you wheel-click (M3) on an ally, you can “Trade” with them.
This opens up their inventory and you can drop things into their inventory. This can be a bandage, for example, and they’ll use the bandage to heal up when they take enough damage. You can also give them blankets, and they’ll use the blankets to protect their inventory from fire or cold damage. This is what happens when you don’t give your allies the appropriate items.
^ That lich destroyed my little girl’s weapon, her [0,18] ring (so -18 PV yikes), and then my Black Cat’s food lol. By the way, after this happened, I’ve since made sure that my allies and I have never been caught without multiple fireproof and coldproof blankets ever again.
But I’ll provide more info about bandages/blankets in the “Nefia checklist” section that’s next.
Anyway, gearing your allies with equipment is a bit trickier. When you give them an equip, and they *think* it’s better than what they currently have equipped in that slot, they’ll swap over to the new item. But if they don’t think so? They’ll ignore it and the new equip will stay in their inventory; they won’t touch it. This is especially annoying if you *know* better than them, that what you’re giving them is better, and they won’t wear it. In this case, forcibly remove what they’re currently wearing (it takes 3 tries since they’ll refuse), and on the third attempt they’ll relinquish it and it’ll cost you -1 karma.
Then, you just have to re-give them the new equip you wanted them to wear and they’ll wear it. And you’ll know it’s being equipped since there’s a yellow “E” next to it.
Also, please feed your allies. For example, if they’re a spellcaster, you may want to feed them food that increases their Magic potential and Magic stat. Or if it’s a pet you’re riding, you may want to feed them food that increases their Strength potential and Strength stat. They can grow faster than you and taking good care of them is how you ensure they can keep fighting alongside you.
To feed them though, I don’t drop food in their inventory as I would with items like blankets/bandages. Instead, I double-click them in my inventory to “grab” them, walk up next to an ally, and “Gift” the food to them. The primary reason is that it makes the whole experience more intimate. Even though that’s true for me, another reason that you could find to do this is because it lets you gain affinity with allies if it’s their “favorite” thing (and why not take the free affinity?). Don’t worry about affinity for now; more on that later when we talk about adventurers (in the “Adventurers” section later).
You also want to make sure you give your allies money too. Not only is it the kind and right thing to do (what, are you going to work your allies to death for free?), it lets them train and raise their skill potentials at a trainer when they go into a town. To give them money, do not gift it to them though, like you would with food, since you’ll only give them one oren at a time. Instead, walk up to them, “Trade” with them (M3), and then use Ctrl + click to split up your orens and give them however much you want to by dropping it in their inventory. Every 2-3 months I typically give all of my allies (well, all 5 of them anyway, lol) a stipend of ~4k orens each, but that’s me personally! You can choose to give them however much you want (or not at all… but I don’t recommend this because not only is it cruel, they also can’t get stronger as quickly either because their skill potentials will remain at base level).
From various tests in Discord, it was concluded that around every 20k orens, they get about +65 potential to all their skills (thank you for the code dive @Stirk). Similarly to how you, as the player, grow more quickly with high skill potentials, so will your allies become significantly more powerful with the appropriate amount of investment and care for them (and enough grinding, aka !dys).
So: food for attribute potentials, money for skill potentials.
The totem pole meta
You can Google what a totem pole is if you’re not sure.
In Elin, we call it a totem pole because you’re riding an ally and another ally is parasitizing on you (aka riding you). And so it looks like a totem pole. Riding uses the “Riding” skill, and parasitizing uses the “Symbiosis” skill.
Refer to this guide here: User:Hachimitsu/Pets
Totem poling is extremely meta and I do it too because when allies “die” while part of the totem pole, they just get knocked out and faint instead of actually dying. Then they wake up hopefully when the fight’s over. Hopefully. Or else they just get knocked out again lol. As seen on Hachi’s guide, you do lose accuracy and speed and stuff, especially if the ally you’re riding isn’t strong enough to let you ride on them (strong enough as in, high enough Strength attribute), but the tradeoff is extremely worth it. And also, for example, if you get hit by a teleport trap and teleport somewhere in the dungeon? You have your totem pole with you, so you’re never actually alone in a bad situation; you’ll always have 2 others with you to help.
Nefia checklist
You’ve probably seen me say the word “Nefia” multiple times now throughout this guide. Just as an explanation in case you don’t have any prior Elona background, “Nefias” are one of the core gameplay loops players can engage in when playing Elona/Elin. It’s the standard randomized dungeon dive, where you enter a dungeon, clear out the floors procedurally, kill everything in your way and grab loot, keep going downstairs, and eventually fight the boss and pick up its lucrative treasure chest. Nefias spawn and despawn throughout your gameplay (and there’s an infinite number of them), so don’t worry about ever “running out”. However, because they’re randomized and you can face a variety of monsters and situations, it’s best to always be prepared, so here’s a checklist with suggestions of things you should bring because they’ll always be helpful regardless of what Nefia you’re challenging (whether it’s a cave Nefia, forest Nefia, tower Nefia, etc.)!
- Bandages - to help regenerate hp
- Fireproof blanket - so your items don’t burn up and get destroyed
- Coldproof blanket - so your items don’t freeze and get shattered
- Fire cane - a ranged magical weapon that, when it hits the target, may inflict the “Burning” status
- Cold cane - a ranged magical weapon that, when it hits the target, may inflict the “Wet” status
- Scroll of escape/return - when you can tell you need to run and/or you’re about to die, but you have time before your impending death
- Piggy bank/kitten bank - to store money in the event you’re about to die and like, you’re at 1 hp and you’re about to get another burning/poison tick or your death is practically guaranteed or something (or just to play it safe)
- Binoculars/telescope - important to note that while these will not make or break a Nefia clear, they’re so extremely handy to have and you should really always have one on you, even if you’re not doing Nefias; they let you look around the map, zoom out, and look around on the overworld (good for searching for treasure map locations, for example, or simply looking for the next Nefia that’s available for you to dive into)
Explanation
- Bandages help you recover hp. You can make a bunch easily (“Quick Craft”), give a couple to each of your allies, and it helps with regenerating hp in-combat, out-of-combat, what have you. It’s like the typical hp regen potions in other games.
- Fireproof blankets are needed, by both you and your allies (each and every person in the party should have at least one with a couple of charges, so don’t give your ally just one with a single charge left). Mainly because enemies that breathe fire are pretty common, and sometimes they may get several fire breaths in before you kill them. And if it takes you several turns to kill them, the first fire breath may destroy the blanket, with the next ones destroying your (or your allies’) inventory/gear.
- Coldproof blankets are needed for the same reason as fireproof blankets, but for cold attacks instead.
- Refer to this guide for how to make both types of blankets: User:Hachimitsu/EarlyGameBeta
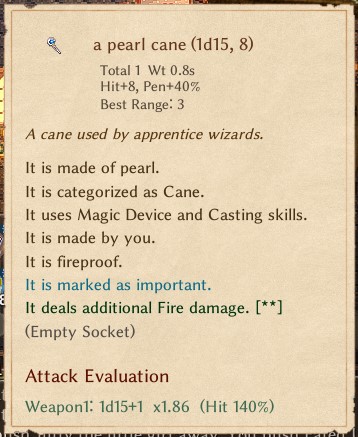
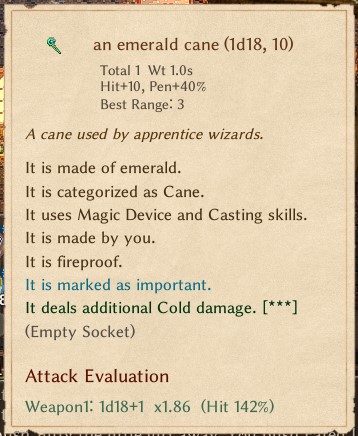
- Canes, despite being magic and inflicting elemental damage, are basically just reskinned bows/guns. They can still miss opponents. However, what makes them distinct from the other ranged weapons is that they will do elemental damage and have a chance of inflicting a status effect (so nerve damage canes can inflict paralysis, darkness damage canes can inflict blindness, etc.). Just to reiterate, it’s a chance, so you may need to zap the cane multiple times before the status ailment sticks. The two most important ones you need are a fire cane and a cold cane. They’re also easy to craft (at a “Carpenter’s table”).
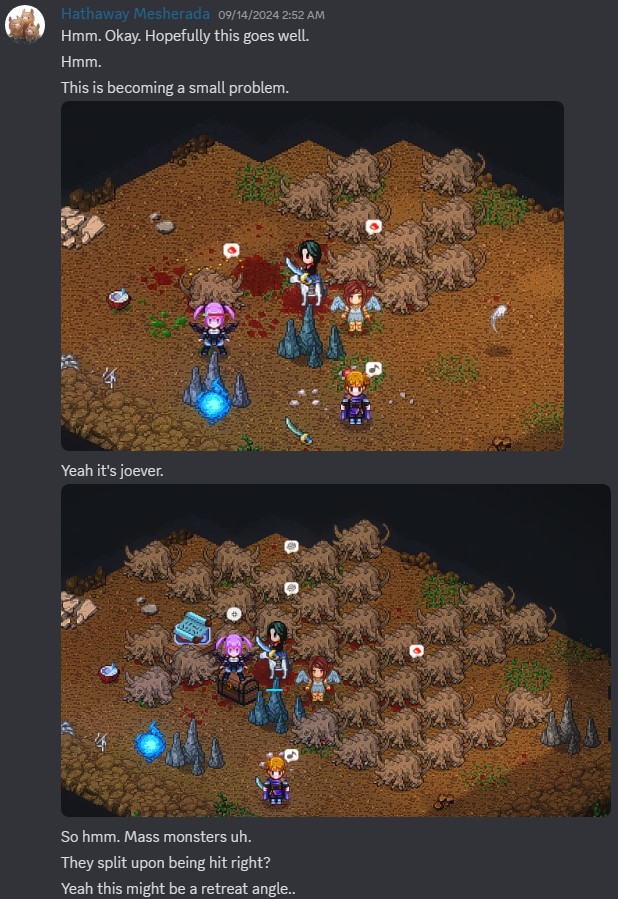
Fire canes inflict “Burning”, which can prevent certain monsters from splitting and multiplying. This is big because if you can’t kill those monsters in time they can split and multiple out of control. And as you can see below, I couldn’t kill them in time and they started multiplying into the hundreds eventually.
Btw, you don’t see my little girl because she’s actually parasitizing on me (this was before I managed to recruit Melilith).
Cold canes can inflict the “Wet” status.
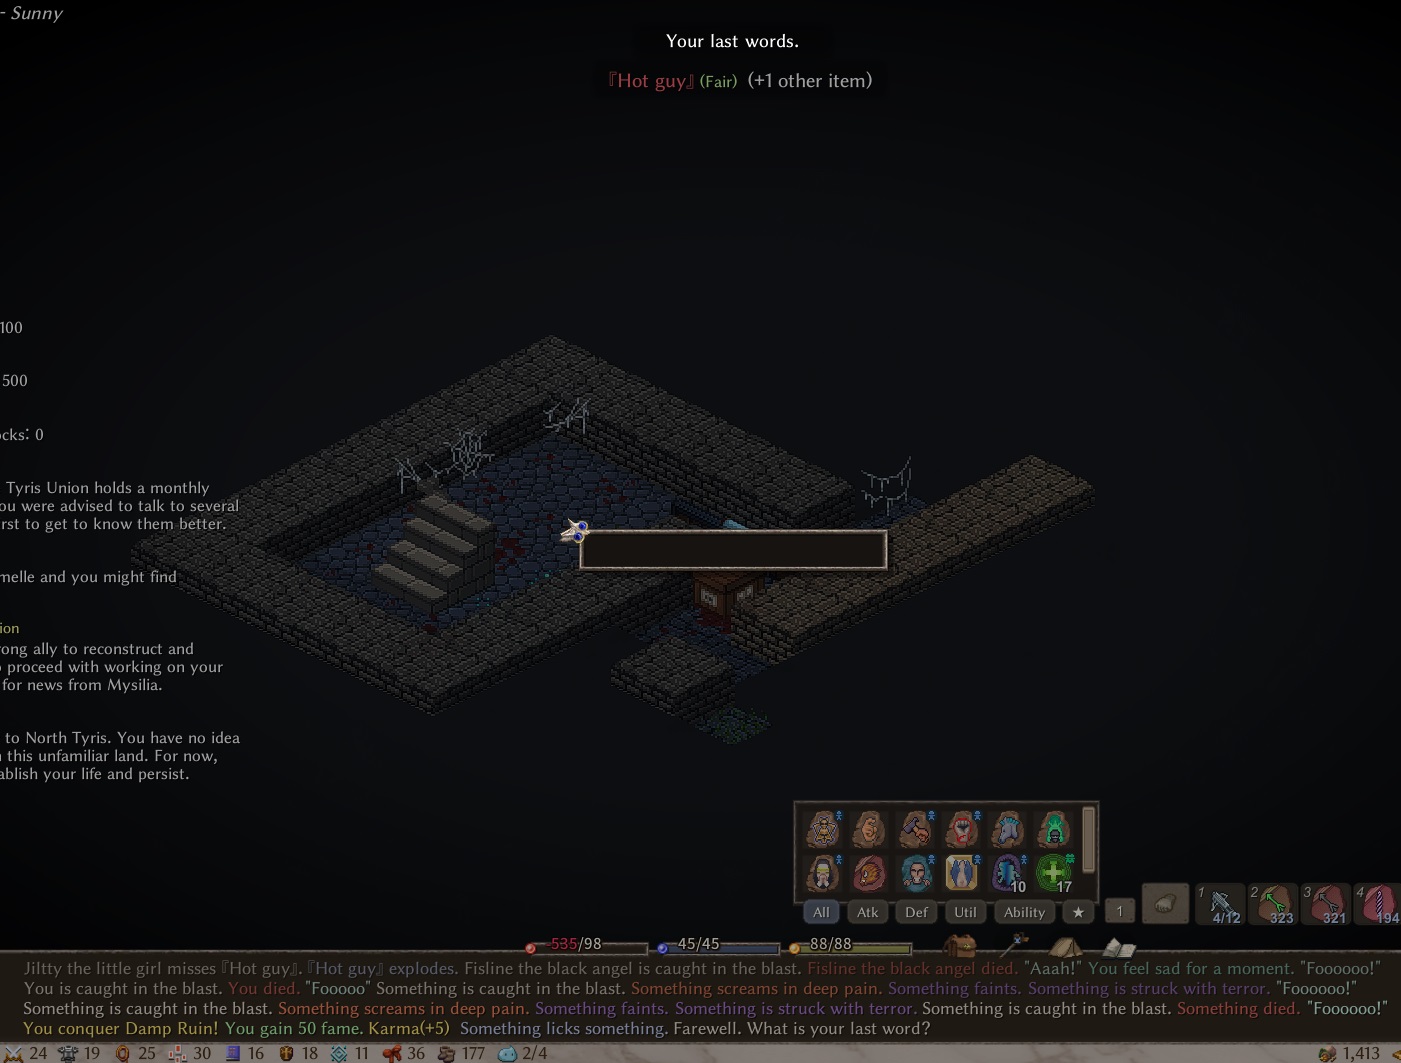
This can reveal invisible enemies (in case you, say, don’t have the “See invisible” spell). It can also prevent certain enemies from exploding, as you can see below.
Obviously potions (or beer) are more reliable if you can throw them on opponents, but they also have a weight and if you have a lot, that weight can start adding up! But canes have infinite zaps (only relying on your mana pool). So if you’re out of potions or something and you’re fighting a hot guy or bomb rock that is threatening to explode and wipe you and your party out, you can try to inflict the Wet status on them and they won’t!
^ Just to clarify, this Hot guy didn’t explode and just died normally because I managed to stick the “Wet” status onto him. Pretty great right?
Also obviously, fire/cold spells will work too (the best option, actually), but what if you’re unlucky and you run out of spell stock for them (and haven’t found any spellbooks to replenish them)? The canes only take up two inventory slots at most and are super light so it can’t hurt to leave them there in case of an emergency and you have no fire/cold spells or throwable potions.
- Scrolls of return can return you to your base or any other safe location you’ve been to, while scrolls of escape take you right outside the Nefia dungeon into the overworld. They take a few turns after you’ve read (or cast) them to activate, so that’s why you use these if you have a few turns before your impending doom. Or if you just want to exit the Nefia once you’ve cleared it.
- The piggy/kitten banks let you store money in them. You should have one of these because while there’s no risk of losing equipment as in (vanilla) Elona, you still have a chance of losing 50% of the money you have on hand. While you should always put your money with the banker, sometimes you forget. So if you’re about to die, you can put all your money in the piggy/kitten bank, die that inevitable death, respawn, and then break the bank later by throwing it on the floor (“grab” it and throw it at least two squares away). Obviously buy a new one after you break it.
- Binoculars or a telescope let you look around the map you’re in. This is extremely handy because say you cast Magic Map. Now, you can use your binoculars or telescope and actually look around the map to see what the spell revealed. You can also zoom out with your binoculars/telescope, and you can see the whole map on your screen. I especially like to do this to make sure I’ve fully cleared each Nefia floor (so that I don’t have any dark, unexplored corners). This isn’t related to Nefias, but you can also use them in the overworld. When you read a treasure map, it’ll reveal a red circle (which marks the buried treasure’s spot) and some clues about the surrounding terrain. Using the binoculars/telescope, you can look around the overworld to see where you have to walk to! It also helps if you’ve cleared all the Nefias close by to your base; you can use the binoculars/telescope to look around and see where your next dive is.
Adventurers
They’re quite different here than they were in Elona. You cannot trade with adventurers. If you want something specific from them, especially if it’s a miracle or godly or precious item, you have to kill them for it. I don’t know if they drop all their items or just miracle/godly/precious items (I’ve never killed one, mainly because I don’t want to commit murder lol, so not 100% sure).
The nice, proper, and kind way to get their items though? It’s by recruiting them. Raise your affinity with them to at least 75 (by talking to them, prostituting yourself to them, giving them their favorite items, giving them love-potioned foods, etc.), challenge them to a duel, beat them in the duel, and then make sure your charisma is higher than their highest attribute. Then you can recruit them and take things from their inventory like any other ally. I did that with Mesherada, for example.
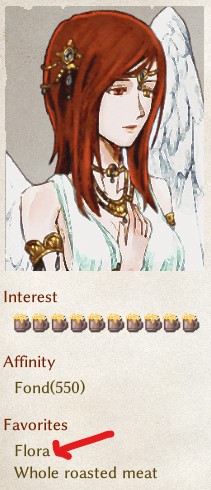
She liked flowers so I gave her a lot of flowers.
^ And of course, she ate them. Because that’s how much she liked them. xd
This goes back to what I was saying earlier about “gifting” food to allies though (double-clicking them in my inventory to “grab” them, walking up next to an ally, and “Gifting” the food to them via wheel-click/M3) rather than just dropping it in their inventory. Because certain allies have foods they’ll prefer, and gifting it to them gives you that boost of affinity if it’s their favorite. That won’t happen if you just drop it in their inventory, but also, the lack of dialogue would hurt my RP heart. orz
Guilds
There are currently four guilds in the game: the Fighters’ Guild, the Mages’ Guild, the Thieves’ Guild, and the Merchants’ Guild.
You can earn contribution points (to rise in rank in the guilds) by performing certain tasks for the guilds. The Mages’ Guild, for example, requires you to read and decipher certain books. Unlike in Elona, you do not have to drop off the books in Lumiest once you’ve read them. Once you’ve read and deciphered the book, you can just do whatever you want with it (ship it, sell it, disassemble it, etc.). However, you cannot retroactively get points for books you’ve deciphered if you read them before joining the guild. So save up all the books you have and don’t read them until you’re a member of the Mages’ Guild. Same with the Merchants’ Guild, where you get contribution points for investing in shops. You do not retroactively get contribution points if you invest in shops before joining the guild.
For the Thieves’ Guild, by the way, you need to get a total of -100 karma. To clarify, this doesn’t mean you need to get -100 karma all in one go. It just means that you need to lose 100 karma in total. So you can, for example, lose 10 karma, do some quests or Nefias to bring it back up, lose 10 more, repeat, etc. And that’d be -20 out of the -100 required. Same thing here where your prior crimes don’t contribute to the -100 karma; as a result, it’s honestly best to visit all the guild towns (Port Kapul, Derphy, Lumiest, southwest-of-Mysilia) as soon as possible to accept the guild admission quests and start working toward them.
Oh, and unlike in Elona, you can join all the guilds simultaneously.
Taxes
On the topic of karma, paying taxes is important. Nerun tells you that tax evasion is the most serious crime you can commit, so don’t do it.
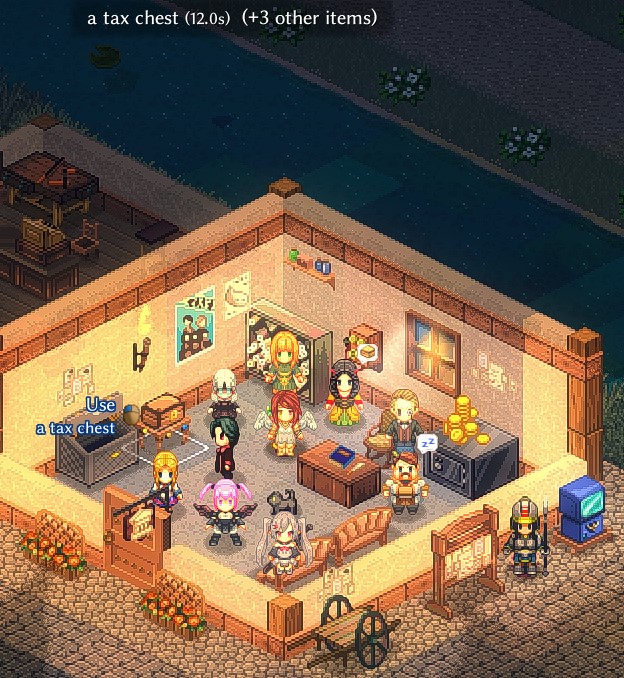
In Elin, you don’t pay your taxes at the Embassy near Palmia, however. The nearest tax box is in Mysilia (southeast of your starting Meadow area).
Once you’re there, just find a nearby guard and ask them where the “tax box” is (you can also do this to find any specific NPC and even random citizens for your requests if you’re delivering something to them).
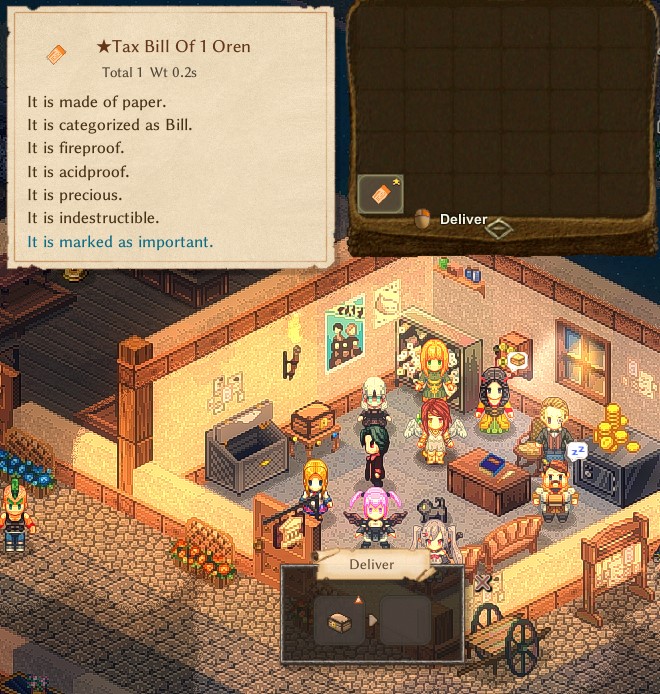
To pay your taxes at the tax box, “grab” (double-click) your tax bill and right-click the tax box to drop it off (it’ll also subtract the same amount of orens from your open inventory).
But it’s a pain to have to go to Mysilia every month…
Furniture tickets
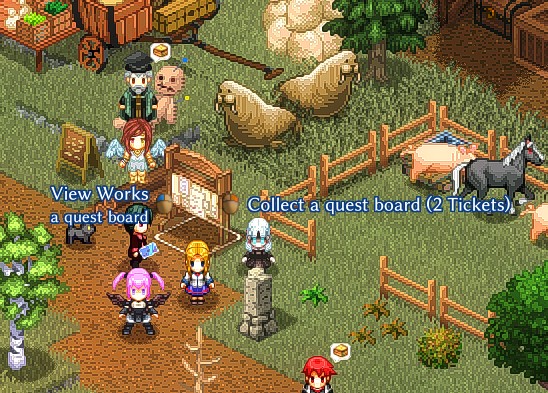
So we can use furniture tickets! A new and important item in Elin is the furniture ticket. You can get them randomly from completing requests in town (from the quest board), or exchanging influence for them at a 1:1 ratio (you get influence for completing requests too). They let you legally take any furniture item you want in that town (that you have the furniture tickets for), provided you have enough. To use them, just “grab” them, go up to the furniture, and right-click what you want.
If there’s multiple furnitures stacked on each other and you want a specific one, just right-click and you can pick which one you want!
So I highly recommend you grab the tax box from Mysilia. Massive QoL improvement so that you can pay your taxes from home.
Farming
There’s a guide in the tutorial (with Loytel) where he teaches you to farm.
There’s also a Wiki guide here: Elin:Farming
With all these resources, I won’t go into too much detail. But I will at least cover or focus on some important details?
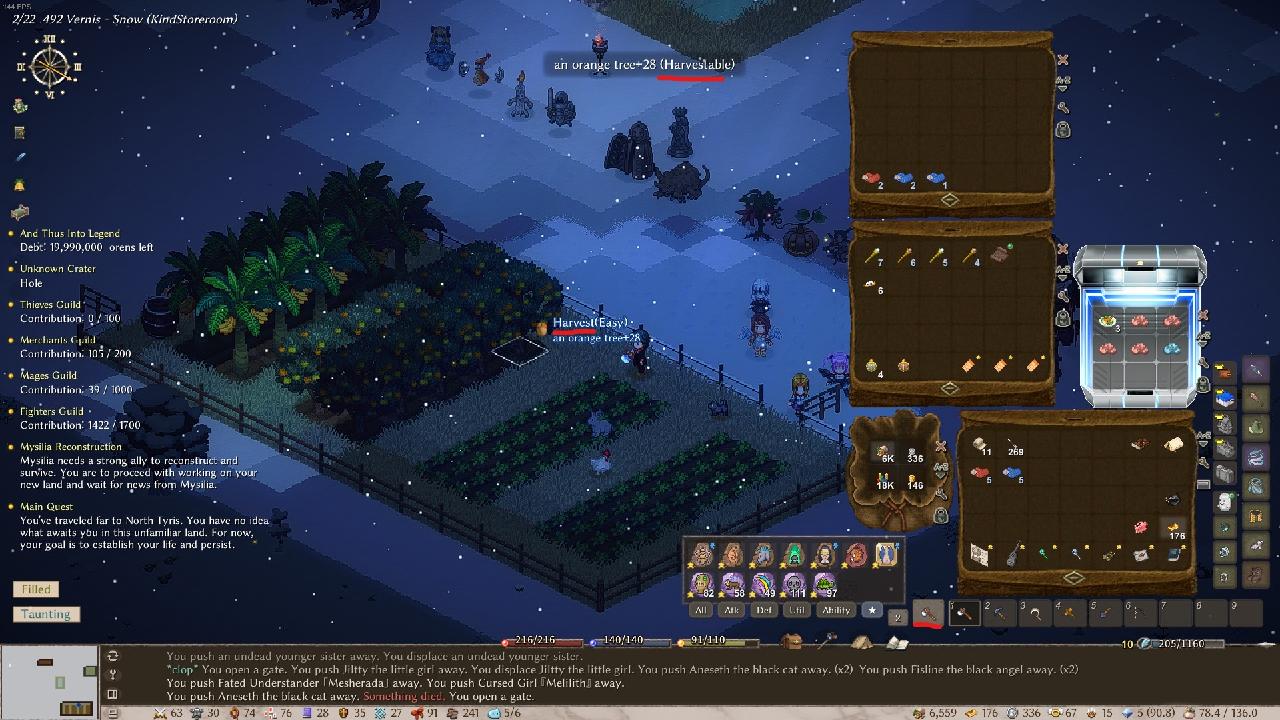
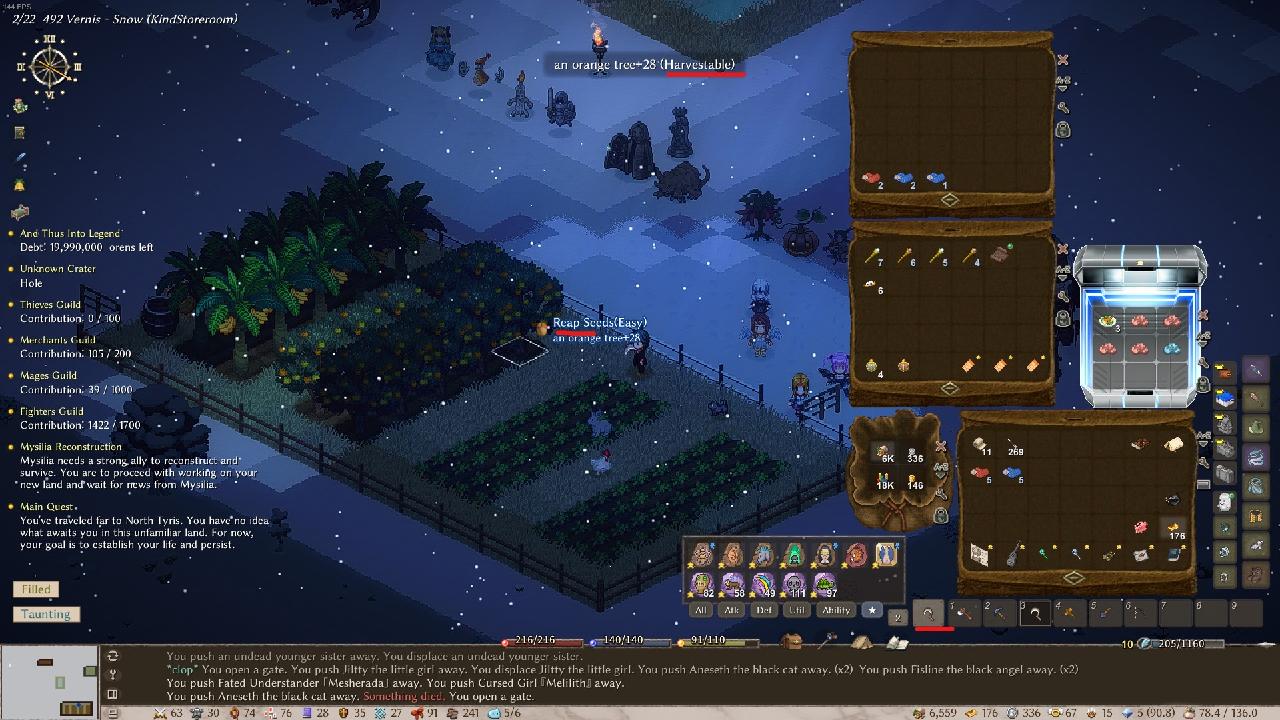
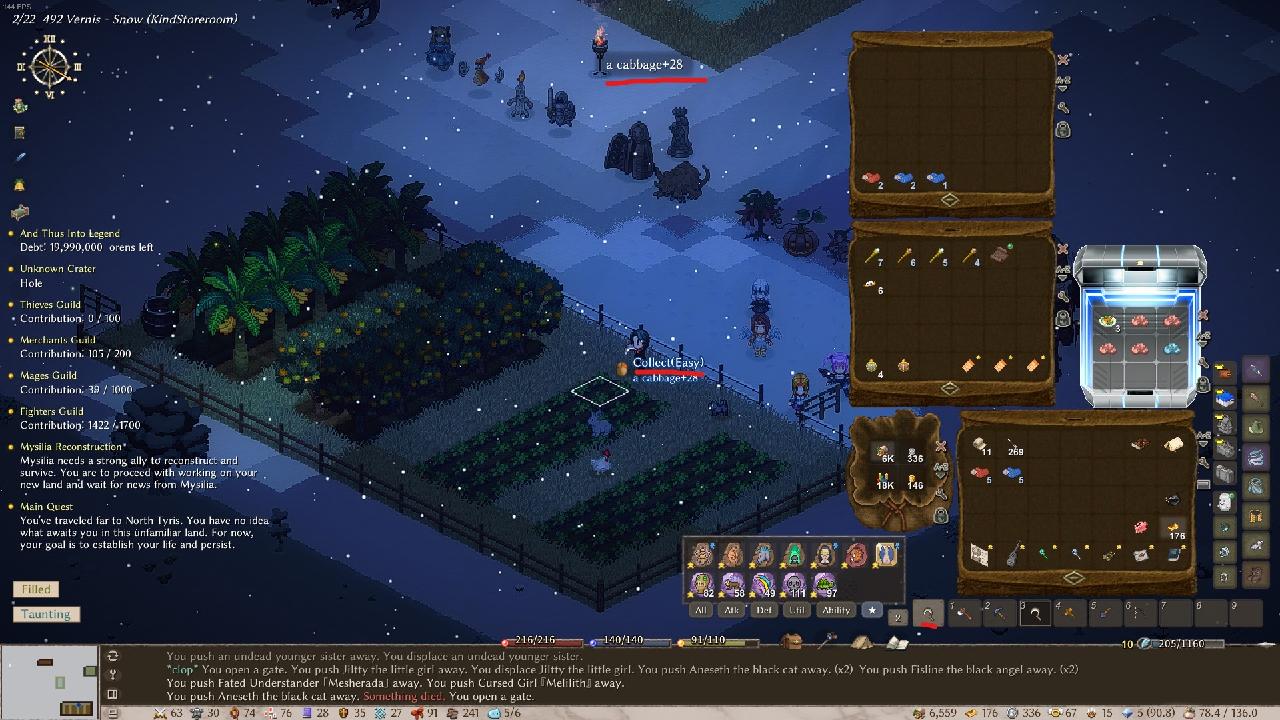
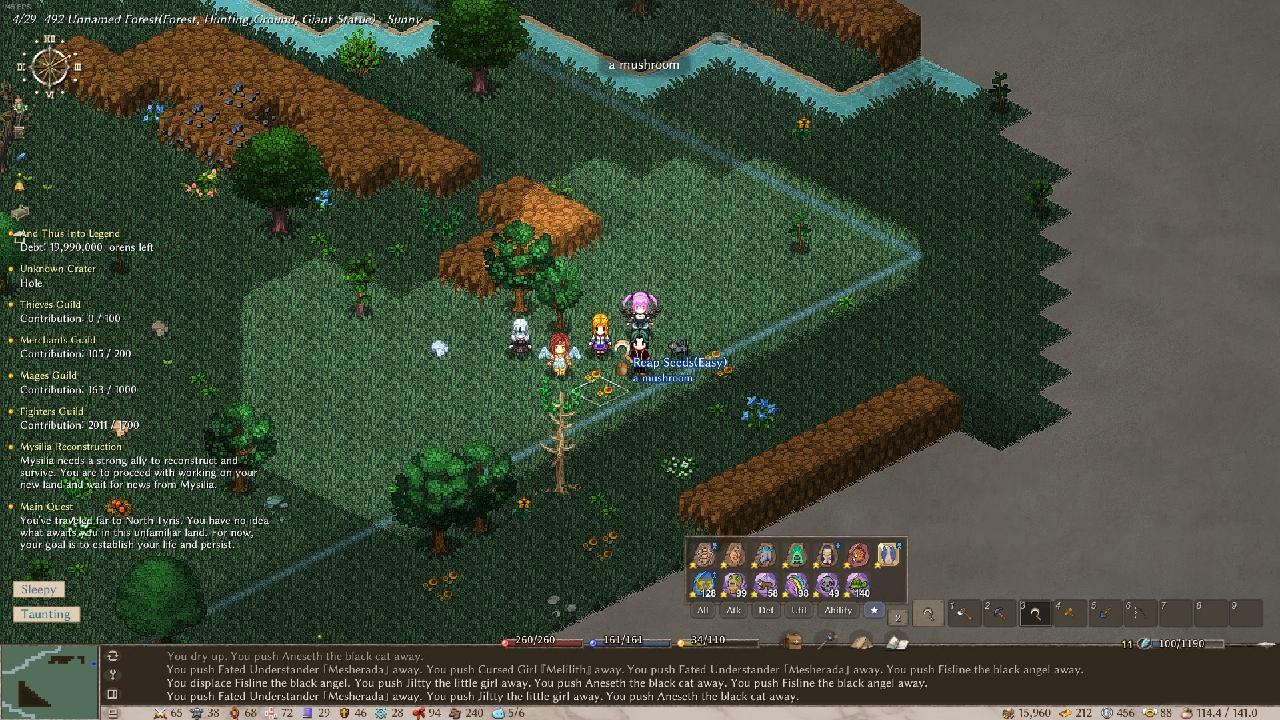
First, a common question I see is how you know when something's ready to be reaped or harvested or not (aka when is it fully grown?). You’ll know when they’re ready to be reaped/harvested because when you hover over them with your appropriate tool in hand (axe or sickle), it’ll say “Harvest” or “Reap Seeds” and on top of your screen, it’ll say like, “Harvestable”.
If they’re not ready, then it’ll just say “Collect” and on top of your screen, it won’t say “Harvestable”. Note that this does depend somewhat on the crop (mushrooms won’t say harvestable or whatever, for example). But the rule generally holds.
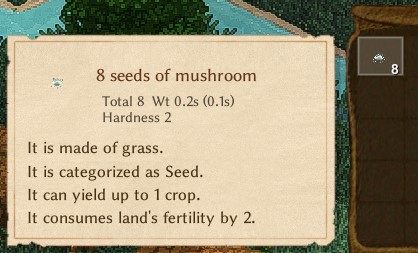
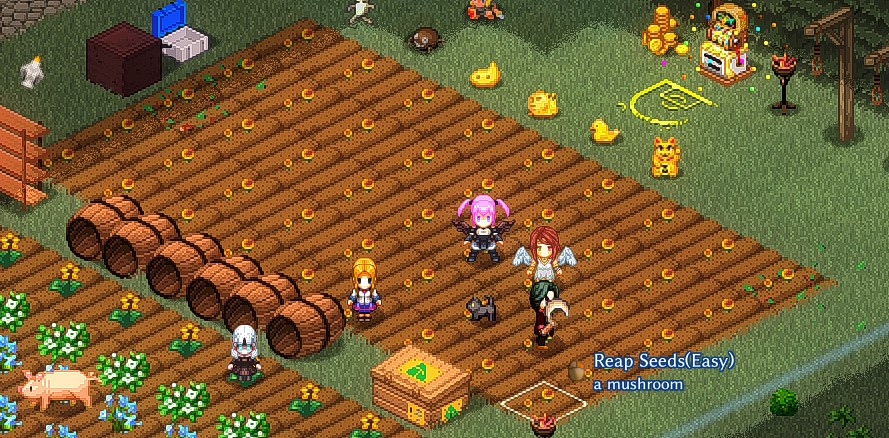
To start out with farming though, basically, use a sickle and reap the plant/crop/whatever to get their “base seeds”. You will know you’ll be able to successfully do this when you hover over the plant with your sickle out and it says “Reap Seeds”. This will give you some +0 base seeds (I call them base seeds because they’re just the most basic seed of that plant with no additional traits).
However, once you plant it and it fully grows? Now you can reap it again with a sickle for a chance to get a random potential modifier.
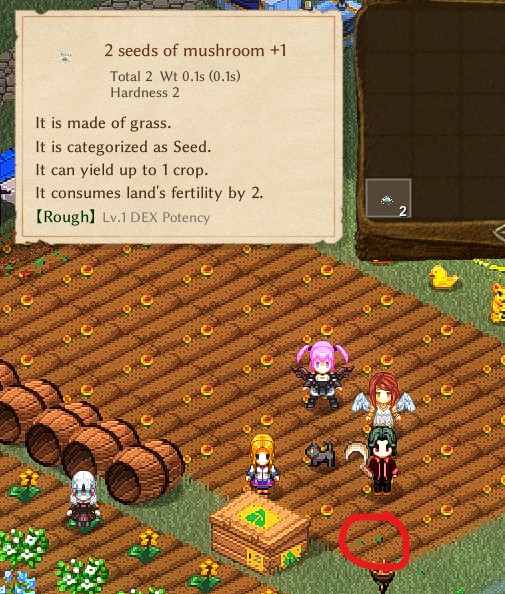
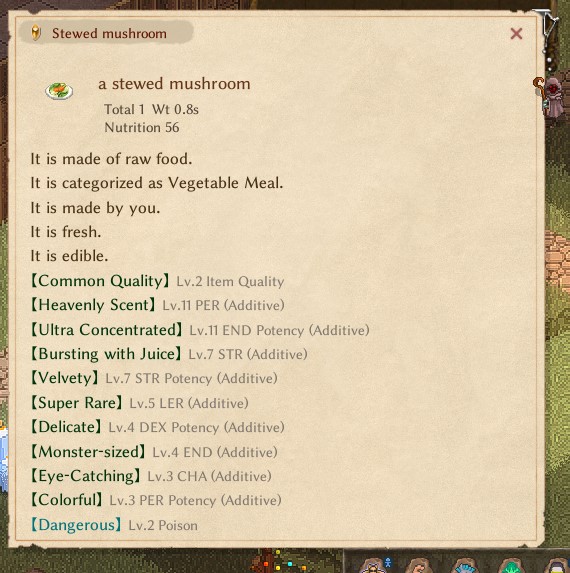
^ As seen here, after I grew the base mushroom seeds and reaped them after they were fully grown, I received +1 mushroom seeds with Dexterity potential. After planting these new +1 seeds, I can then harvest them later (with an axe) for +1 mushroom crops with Dexterity potential.
The basic idea with farming is that you’re completely subject to RNG while you’re trying to get your base seed to become +1 in a random potential “line”. Once that potential line’s been determined though, you’re set. From that point on, you can just keep reaping, harvesting, replanting, etc. that seed and it’ll eventually level up based on your Farming skill.
Since the potential lines are RNG though, it may take a lot of base seed reaps before you get into the line you want (whether that’s strength, dexterity, magic, etc.).
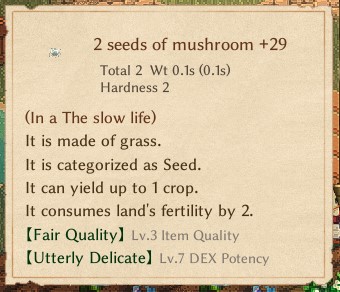
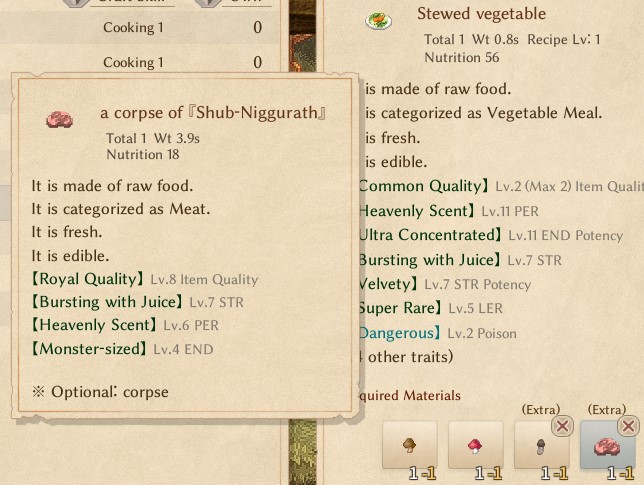
When reaping for seeds, you can also have a chance of getting multiple seeds. This means that you can reap one less crop for its seed, and instead harvest it for its crop product. So you saw how I got two +1 mushroom seeds? That’s 2 from that 1 crop, meaning I can now have two +1 Dexterity potential mushrooms. A good rule of thumb is that you want to generally grow double of whatever crop you want; half of them you’ll reap with your sickle (and generally RNG’s favorable enough that you get enough seeds to replant everything). With the other half, you’ll harvest with your axe for the crop product. But also, back to the seed levels too. The +1 seeds right? As I level up my Farming skill further, when I’m reaping half my crops for seeds, sometimes they’ll randomly level up (to +2). This will repeat and eventually my seeds (and subsequent mushroom crop) will have much, much higher attribute potentials. And for example, this is a mushroom I harvested after planting a +29 seed.
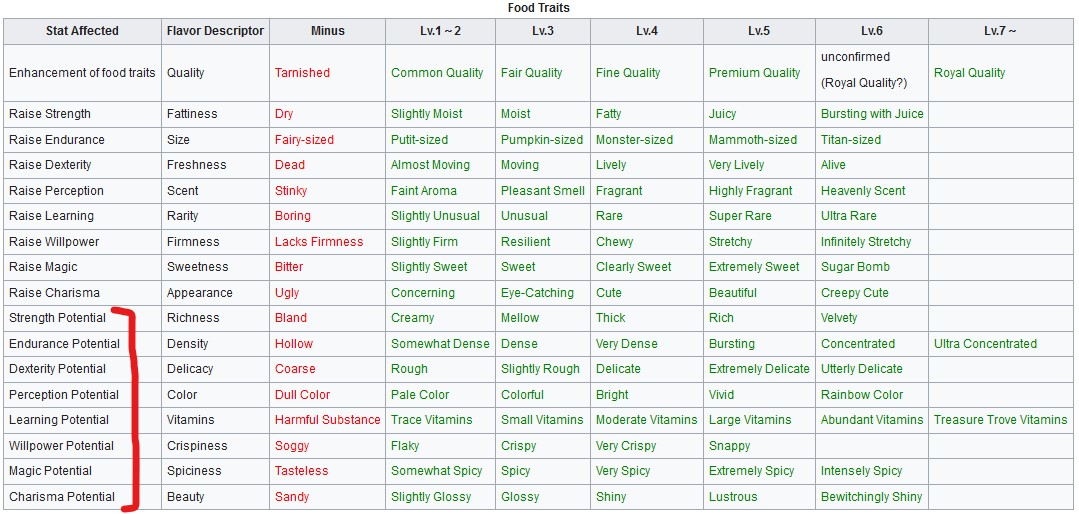
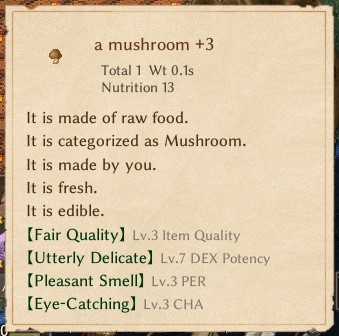
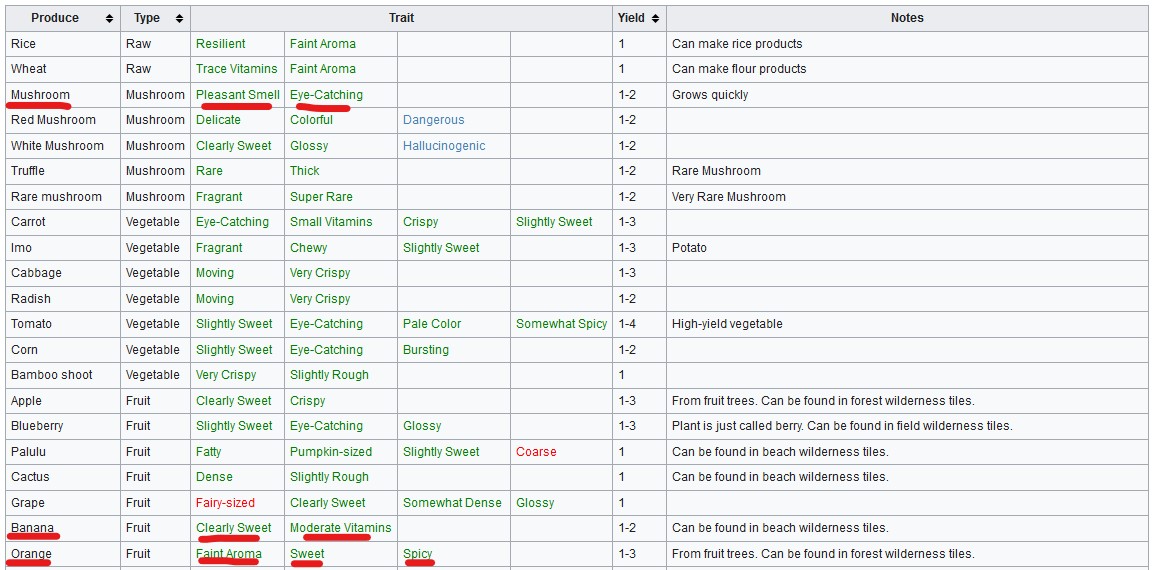
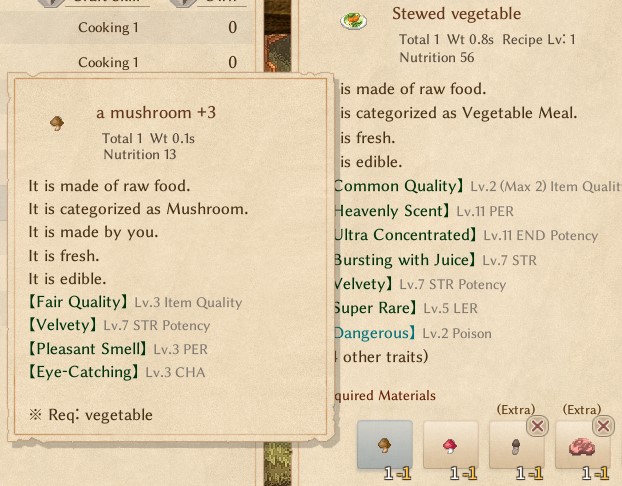
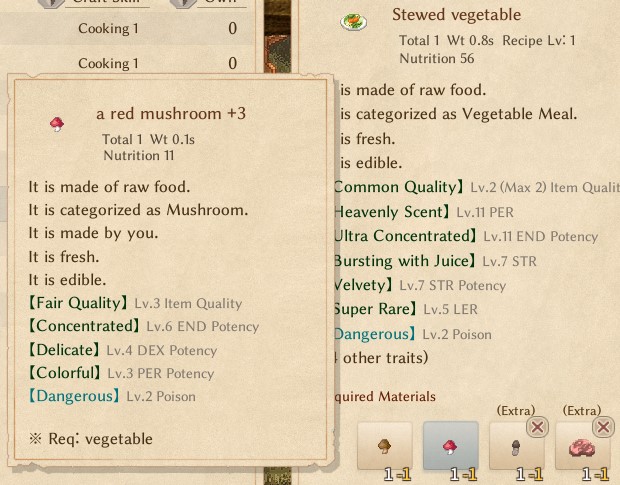
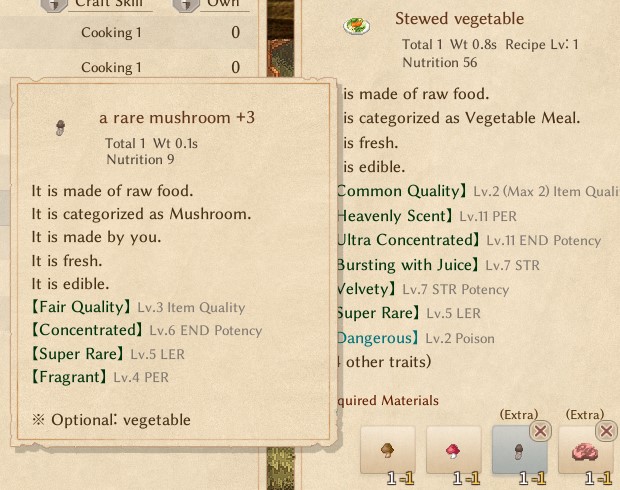
Something you may have noticed is that the +3 mushroom I showed had “7 DEX Potency”, along with “3 PER” and “3 CHA”.
When growing crops, you do have control over their potential lines; however, all crops also intrinsically have their own inherent characteristics. Brown mushrooms will always have the potential line you’re target farming, along with some PER and CHA exp. Bananas, on the other hand, will always have the potential line you’re target farming, along with LER potency (potential) and some MAG exp. Oranges will have the potential you’re controlling for along with MAG potency, and MAG and PER exp.
All this information is here: Elin:Food
And if you forget what each trait means, just scroll up to find the table I shared earlier.
Why does this matter…?
Foods
Because it’s how you can cook food. Elin gives you so much control over how you can cook food and what products you create, you and your allies will never really be short on attribute potentials.
For example, since my little girl is using Polearms and she’s kind of the frontliner, her Endurance stat is expected to be, and should be, the highest. So I usually give her a lot of Endurance-potential boosting foods (though I give them all a well-balanced diet so all of their potentials are basically capped out).
Look at these pictures and see what I’m feeding my little girl.
Crops let you fine-tune what foods you’re creating, what you’re feeding your allies, and even what you’re eating yourself. (Also why “Gourmet” is such an important feat.)
But say you’re completely new and you’re constantly starving to death, right? Or at least, it’s something causing you a bit of concern constantly: staying fed. The easiest way to deal with this is to go to any wilderness tiles and harvest: berries, crim, api nuts, bamboo shoots, or even flowers if you’re that desperate. This isn’t a good idea in the long-run though, because satiety (fullness) is such an important thing to manage in this game. Since foods are the easiest, most reliable, and powerful way of raising your attributes and stats, filling yourself up on useless foods is a waste of satiety. It also takes forever eventually to burn through satiety (if I eat a “60 nutrition” food, I will often remain “Bloated” for like a day and a half in-game before I can eat anything else). But still, if you’re dying from starvation, I don’t think raising your stats is your primary concern.
Gods/favor
I have a slight preference for which god I worship and follow. (Lulwy-sama. orz) I don’t particularly care for the meta, so even though it may be more advantageous to switch gods around to get every reward before settling on one, or now that there’ve been new additions/updates to god weapons… I couldn’t turn apostate on Lulwy. I guess you could say it’s part of the RP thing I’ve been talking about and how I get fully immersed into the game haha, and how I play things exactly how I would do them if I were to be isekai’d lol.
Following gods is pretty simple. If you’re lucky, you can find an altar in the wilderness and just start worshiping there. If you aren’t, just go to the Truce Grounds north of Palmia (same as in Elona). Make sure you grab the “Model Follower” feat I mentioned earlier, specifically level 2 to have your allies also pray along with you (since it also trains their Faith too). And you’re set.
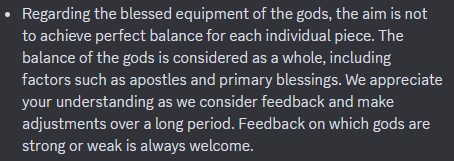
Honestly, every god in Elin is viable. It just depends on your playstyle (combat, slow life) as well as how you approach the game (like, meta-ing and min-maxing, RPing, etc.). I can confidently say this because as per the Word of God about gods:
You have to consider everything that each god has to offer when you choose to follow them. For example, Kumiromi’s weapon (the Elin:Kumiromi Sythe) is absolutely amazing and can change the battlefield into a mini Plants vs. Zombies. He also supports a few lifeskills through his passive (such as Farming, Alchemy, and Weaving), and you can generate enhanced seeds from rotting food as well as special, rainbow fruit seeds from the Cute Fairy pet. On the other hand, you can’t really go wrong with Opatos of Earth either. His passive supports Strength, Endurance, and Weightlifting (and some others), which you’ll benefit from regardless of your gameplay plan. As someone once said, “Constitution (and by extension, hp) is not a dump stat.” You’ll also always be carrying things so weightlifting doesn’t hurt either. The nicest parts? His bonus is that all damage is reduced by 10%. The Golden Knight pet is a nice tank and walking storage (starting out with a staggering 260s weight carrying capacity), and Opatos’ Elin:Earth Hammer? It further reduces physical damage by 10%, elemental damage by 10%, and whoever is wielding it has their life increased by 100%. That’s a lot of hp. And that’s only just a few of the effects it has.
Off-topic for a quick second, but you probably see “Faction” attached to various god weapons’ enchantments. It is simultaneously a restriction and a massive boon. When something is a “Faction” effect, it applies to everyone in your faction (aka party). This means that, for example, if you gave the Earth Hammer to your pet and you weren’t personally wielding it, you’d still get the physical and elemental damage reduction, the mind resistance, etc. However, the faction effects will only persist as long as you’re following that god. If you were to turn apostate and abandon Opatos, the faction effects would be stripped from the weapon and you’d be left with the remaining non-faction effects. You do get them back if you return to the god whose faction effects you want, so don’t worry! It’s just a way to keep all the gods balanced so you don’t just go on a collecting spree and become too OP with all their weapons; you’ll also have to consider which gods’ weapons have faction effects that matter to you the most, or that you are willing to lose in exchange for another god’s passives or bonuses. Just something to keep in mind!
On that note, I’ll just list out some gods to think about if you really have absolutely no idea who to follow:
- Opatos of Earth gives you bonuses to your hp (Strength and Endurance), and his 10% damage mitigation is useful to basically everyone who will get hit at least once. (You will get hit at least once.) The pet is nice, and so is the weapon! See here: Elin:Opatos of Earth.
- Itzpalt of Element is great too. I won’t go too in-depth into it here because that’s a separate discussion/guide entirely, but he provides massive resistances to fire, ice, and lightning. With how resistances work in Elin, it is entirely possible you can eventually become fully immune to those 3 elements by following him long enough, and instead you can plan out your gear around other stats or getting other elemental resistances. His pet, the Exile, does great damage, and has immunity to nether, dark, and magic damage. (That’s almost full immunity to almost every element in the game!) And his weapon…? The Elin:Elemental Staff provides a beautiful, and massive, faction-wide enhancement to spells (spells do more damage obviously).
Anyway, I’m talking all about meta and all that. You could also be like me, and simply worship and follow a god based on whose personality best fits yours, or who you like the most simply by their… personality/characteristics. This is where I come in. I follow Lulwy because… let’s not talk about why specifically, but I do it for RP reasons! She may not be the best fit for my playstyle, but I love her a lot, and I do it even though it’s not meta! (I’ve also only followed two gods ever. Ehekatl first for the Black Cat follower, and then switched over to Lulwy, who I’ve been with ever since.) I’m missing out on things like the Elemental Staff, Elin:Ring of Void, and Elin:Holy Lance (this last one would mainly be for my little girl who’s a Polearm user), but oh well, right? Haha. It’s all in the name of RPing accurately (as I would do if I was isekai’d and was like, lemme get the Black Cat apostle before turning apostate and dedicating myself to Lulwy).
You can find all this information here: Elin:Gods. I recommend you pull up this Wiki page so you can reference it as I dive into the next concept.
Approximating favor
The main purpose for this section is to talk about “approximating favor”. Your Faith skill level determines the maximum amount of favor you can have, and you need certain Faith levels (along with the maximum favor at that Faith level) to get your god’s pet and eventually god’s weapon. You can’t find out your actual favor you have, but you can approximate it based on messages you receive and your current Faith level. So you’ll need the maximum favor at Faith level 15 to get your god’s pet (by manually praying, btw), and the god’s weapon is at Faith level 30 (also maximum favor).
If my Faith is 20 and I’m offering things and I get the “You felt God's presence far away” message (or something like that), I’d know that my favor required is nowhere near close. However, if my Faith is 20 and I get the “You feel a sense of peace”, I’d know that I’m almost there toward the favor required to get my god’s pet (since the god’s pet is, again, max favor at Faith level 15). Once I offer at Faith level 20 and I get the “You feel as if your God is right beside you” message, using quick maffs, I can guess that I probably have the required favor to get the god’s pet by manually praying.
This matters because if you’re swapping around gods to collect all the weapons, for example, you’ll be at Faith level 30 at least. How would you know when you can receive your current god’s pet? Or if your Faith is level… 60, idk, how would you know when you can manually pray to get the weapon?
So if you just got your weapon from… Kizuami of Trickery (the “Kogitsunemaru”), which obviously means your Faith is at least level 30, and now you’re swapping over to Kumiromi of Harvest for his “Cute Fairy” pet and “Kumiromi Scythe” weapon, you’re now starting from scratch with 0 favor. You can keep offering until you get the “You feel a sense of peace”, which should indicate that you’re within the favor range to get a pet (probably? Again, quick maffs) since favor increases linearly with faith. So 50% favor at Faith level 30 is equivalent to 100% favor at Faith level 15. So you’d manually pray once you get the message. (Or maybe do a few more offerings to make sure, since technically that message *can* come at 45% of max favor, and not necessarily 50%.) You also get the message around every 30 favor’s worth of offerings, so… more quick maffs if you’re down. And I guess if your Faith is 60, you can just manually pray for the pet once you get the “You felt the distance between you and God shrinking”, and pray for the weapon once you get the “You feel a sense of peace” message.
Ether disease
Ether disease can be pretty scary at first. If you’re starting out, you may feel like you’re racing against the clock before the ether disease overtakes you. But it’s honestly super easy. Maybe even a skill issue, if you want to call it that.
Remember the Thieves’ Guild thing I mentioned earlier? Try to join it asap. Like, head over to Derphy whenever you can/it’s along the way. That way, you can work toward getting that -100 karma total asap. I also say all this because you were able to learn guild-specific skills by sneaking into the guilds back then, but I think it got nerfed to where you can’t learn guild-specific skills now unless you’re a member. Even if you make it in. (It’s not really relevant to you if you’re starting in EA, but in alpha and most of beta, you could rush into guilds sneakily and learn the skills before joining them. *cough* Thieves’ Guild hidden entrance.)
Once you learn Pickpocket from the Thieves’ Guild trainer, you can now go to the Fortune Bell, which is a massive floating casino next to Palmia. I’m not going to go into the details around how to (because I’m a law-abiding citizen), so ask on Discord or something, but try to steal the basketball hoop (it’s called a “throwing circle”). Once you have that, you’re set. You can bring it back home.
This lets you play “Putit Basketball”. This is your easiest and best and fastest way to get casino chips, which let you buy potions of ether antibody (Elona’s “potions of cure corruption”). It is fast and it is easy and it is the best. If you can’t do it, honestly, skill issue.
Look at this screenshot for example.
For reference, that means I got 117 putits in a row through the hoop (well, technically you can have 4 misses before you have to reset from 0). And at that point where I was, every additional putit in gave me 1024 casino chips (it’s that multiplier next to the score).
Ether antibody potions cost 3k casino chips, so…
Word of warning regarding ether disease and the importance of marking your gear as important
You know how in other games, you can mark gear as “important” or something similar so you can protect it from yourself? Like, so you don’t accidentally sell it or throw it away or something.
You should do that in this game too. There are various ether diseases that you can see here: Elin:Ether Disease.
Some of them give you certain stats in exchange for a significant loss in another stat, while some just straight-up subtract stats, and yet others change your gameplay and make you play around them. And finally, some make you unable to wear certain gear with the removal of an equipment slot (at least until the disease is cured). The dangerous thing about this latter type of disease is that if you’re wearing something in that equipment slot and then the slot gets removed, the corresponding piece of equipment is sent back into your inventory. If it catches you while you’re unaware and you’re not paying attention, you can accidentally ship or sell the equipment. And it’ll be permanently gone.
So honestly, just mark everything you don’t want to accidentally lose as “important”. You can do this by wheel-clicking (M3) the item, and the options will pop up.
Making money
I’m going to avoid talking about job requests and Nefias since those are dependent on your fame, the levels of content you’re tackling, etc. I’m going to focus on the very early game where you might be struggling with (or are simply just stressed out about) paying your taxes on time.
There is a section in the guide here that talks about making money, but I’ll also kind of reiterate some things since that’s how I do it too: User:Hachimitsu/EarlyGameBeta
The easiest way when starting out is to explore the wilderness in the overworld until you come across those randomly-generated shrine(?) areas(?). You’ll see an altar surrounded by multiple heavy big pillars. You can lug them back and sell them (or ship them). The reason why this isn’t worth it later on is because it takes time to find these (they’re not rare at all, but they’re not super common either? Just slightly uncommon at worst), and the amount of money really isn’t worth it. By the time you can lug all of them, you can easily make at least 10x that much from a single job request that pays in the couple thousands. And also it’s such a time waster to have to walk back and forth to drop them off and sell them. I say this because you can’t grab them all at once (early on, anyway, which is when these matter more or are more helpful) because above a certain encumbrance level, you get “Squashed” and you can’t move at all. And if you’re “Overweight”, while you can still move, you risk taking fatal damage that can kill you if you’re traveling in the overworld back to your base as you carry these, in which case you risk dropping your money (because death), so… usually, you grab one or two at a time, make the trek back, drop them off, come back, grab 2 more, repeat. It’s a massive waste of time. But this gives you a nice starting amount of money if you’re struggling.
This got nerfed, but making mushroom wine. Mushroom crops grow extremely quickly, and you can let them ferment into mushroom wine (which don’t sell for a lot, but decent enough when you’re starting out). You’ll need to start a mushroom farm (please pay attention to the tutorial), get the recipe of “Brewery barrel” from Farris (main story quest-related NPC), and then you can craft it at the “Workbench”.
However… you need logs, tight rope (string from Workbench + big leaves from the beach tiles in the overworld), nails (bones at the “Tinker’s table”), AND fertilizer.
Fertilizer comes from, by the way, “Compost boxes”, which require wood planks and tight rope. (Throw things like hearts, offals, corpses, etc. into the compost box and they rot into fertilizer. They can’t already be rotten though, btw.)
Honestly, learn to use this: Elin:Creating
It’s not fully complete yet so there are many recipes still missing. Or just ask on Discord.
So mushrooms ferment into mushroom wine, and you can ship that.
Crim powder also sells for an even nicer amount, but crim berries take rather long to grow, and you’ll need a “Millstone” to grind 2 crim berries together to make crim powder. I mean, just ask the people on Discord if you want to start doing this. It’s too much work to explain here (and for you to start doing it) in exchange for what it gives tbh.
You can also just craft furniture. It’s simple, the materials are plentiful, and you can do this right from the start of the game!
Now beehives and sugar wine? Now this is something even I still do.
You need a beehive. You’ll need either 60 Mysilia furniture tickets (if I’m recalling correctly) to collect one, or you can make it with a rare crafting ingredient: the queen bee (you get these from killing bee/wasp-type enemies, which are especially common in forest Nefias). Either way, both methods take a bit of time if you’re starting out, so this is a bit more long-term I guess. But the payout is absolutely worth it. (Even I still do it like I said.)
Each day, the beehive has a chance to generate 1 “honeycomb”. You can grind 2 of these at a millstone to make 1 “pot of honey”, which turns into “honey wine” in the brewery barrel.
Or, you can throw the 1 honeycomb into a “Kiln” and bake it into 2 “bags of sugar”. The two bags of sugar can then ferment into “sugar wine” in the brewery barrel. The sugar wine is worth less individually than the honey wine, but you have much, much more of it, making it significantly more profitable. For reference:
I haven’t verified if things have changed yet, but in general (I think this is the rule of thumb?), you want 10 flowers per beehive. Something about how flowers affect honeycomb production rate… There was some update and it’s in the patch notes but I’m too lazy to check. And you can keep your flowers from withering and dying, btw, by making “defertilizer” in the millstone. (It’s fertilizer + a trash bag.)
Tips and other minor things
Whatever comes to mind will be added here. Spoilers ahead I guess, so be careful! Skip the “Melilith” section if you don’t want to be spoiled.
Getting favor quickly with certain gods
Corpses will work for all gods, but certain offerings will make them happier and you’ll get more favor. I’ll summarize the ones that I know how to get favor with somewhat easily (y’know, considering my own playstyle btw; some other players might have even more meta strategies or something, idk).
- Kumiromi of Harvest: If you sickle everything, you’ll have more seeds than you know what to do with. You can sickle the infinite wilderness plants for infinite seeds.
- Opatos of Earth: Just mine the walls in cave Nefias. You’ll have more ores than you know what to do with (though in high enough quantities, they can weigh a lot so it may take several trips to bring them all back to your base).
- Mani of Machine: 2x crim berries --(Millstone)--> ~2x crim powder. Crim powder’s a drug, so you can just start a crim berry farm to do this easily.
- Ehekatl of Luck: You can make “bait” with the “Quick Craft” ability. You can make bait from almost anything, whether it’s corpses, hearts, grotesque offals, bones, skins, or fangs. Then just make a fishing rod with the Workbench and start fishing in any water tile (your starting Meadow has that little pond, which is perfect for this).
- Lulwy of Wind: orz My favorite goddess. Anyway, mushroom wines are the easiest since you can start right away and you’re not losing out on too much money by offering them. Refer to the “Making money” section where I detail how to start making mushroom wine.
Altar in your base
Whether you plan on ever worshiping Ehekatl of Luck or not, you should still try to get her altar at least some point in the game to bring it back to your base. This is because compared to most other gods’ altars which weigh 240s (and will most likely squash you), hers only weighs “80s”. With enough !dys, you can safely carry this back to your base and convert it to your god’s. Now you can worship from home!
Throwing heavy furniture
When you grab something very heavy, you’ll get “Squashed” and you won’t be able to move. However, you can also “grab” these heavy things in your inventory and throw them away from you, as long as that area you’re aiming at is lit up. This is immensely helpful because say you have an altar in your base and you’re trying to move it. You can move it around your base by picking it up, throwing it, and repeating this process.
Ctrl + F
Literally Ctrl + F. Doing this opens up a little menu that lets you search for any item you want that’s in your base. Amazing because it searches for everything, whether it’s in your inventory, in your allies’ inventories, in a storage chest, or even on the floor. You can then click on the item to auto-walk there. Extremely useful because there’ve been a few people who have said they can’t find a god weapon after offering, only to Ctrl + F and find it hidden in the grass somewhere.
Auto Dumping
This isn’t so much a “tip” or “trick” as it is just a pointer or reminder that this function exists. If you’ve played Terraria before, it’s like the “Quick Stack” function there. Any items in your inventory that already exist in any current chests in your home will automatically be stored there (your character will move to the appropriate chests). For example, if I have a storage chest to store wood stuffs (logs, sticks, etc.), one to store stone stuffs (stones, ores, etc.), and various other chests (potions, scrolls, etc.), when I click “Auto Dump”, I’ll automatically deposit everything I have in my inventory into the appropriate chest as long as there’s another copy of it in there already (great when you just cleared a Nefia, or went out and gathered a bunch of resources).
Melilith (SPOILER AHEAD)
Melilith is one of my main 5 allies. She’s amazing because of how versatile she is (summons, casts spells for direct damage, casts damage-over-time spells, buffs, debuffs, and even casts Resurrect once a day). However, you can miss out on recruiting her if you’re not careful and paying attention.
When you do the “Cursed Manor” DLC quest, make sure you pay attention to the fact that you can only grab one item from the treasure room. Make sure you also fully explore the room and grab the “★Ticket to become Melilith’s friend”, NOT the rod of wishing. Also, aside from the fact that she’s worth more than any wish you could make (imo), the storyline is just so sweet and heartwarming if you choose her.
Harvest Season job requests (the Harvest Time quests from Elona)
The famous job request that has you gathering a bunch of crops to meet a quota while you’re on a timer makes a return once again in Elin. This whole section is especially picture-heavy (just because I wanted to explain how it looks on my end, especially after I use Magic Map, look around with my cursor, throw the crops, etc.). It’ll be hard to read the tips and tricks while they’re so interspersed between all the pictures though, so I’ll just talk about and describe everything first here and then show all the screenshots together afterward.
You start off in the middle of the map next to the delivery box as you did in Elona. I like to instantly cast Magic Map a couple times to reveal the map as much as possible and to see what plots are closest to me (and at higher spell levels like mine, 1-3 casts is enough, but if your Magic Map spell is lower level, you might need to cast a few more times). Next I use my binoculars/telescope to see what plots are close by for me to hover my cursor over, or if I have to walk in a direction with several plots next to each other (I don’t want to walk in a direction with only one plot, y’know?). Then I bring my cursor over various crops I see on my screen and look at their sizes. Each plot has a certain crop, and their sizes are all relatively similar to each other (within that plot). So for example, if I see a certain plot has a “small corn”, I know all the other corns in that plot will be “small”, “handy”, etc. However, if I see a corn (well, in the example screenshot, a radish) that’s “very huge”, I’ll know that all the other radishes in that plot will also be around “rather big”, “huge”, “very huge”, “monstrous-size”, etc. The best plots to go to, though, are the ones where the crops are like “bigger than a man”, “heavier than an elephant”, or “legendary-sized”. Start gathering (an axe is the best tool for this), and make sure you have pets/allies near by so you don’t get interrupted (massive waste of time especially when you’re gathering larger crops, since you have to restart gathering that one entirely). At some point you’ll become overweight. This is bad because as you’ll see in one of the screenshots (where I’m throwing potatoes), in the log it shows I got interrupted (same as if I got attacked by a monster). The strategy here, then, is that you can throw the crops in the direction of the box to lighten your load (to throw, it’s like using ranged weapons or throwables; “grab” the crop and aim). However, you’re limited by the amount of light available. I could only throw the potatoes as far as I could see (so technically doing this job request in the morning is actually better, as you can see farther). After that, resume chopping and gathering.
When you walk over the crops you threw, you’ll automatically pick them up (default settings if I recall correctly), which is great, but also it’ll probably instantly “Squash” you and you won’t be able to move. So… just throw all of your crops in the direction of the box again (just do this until you get to the “Burden!” status). And go to the next plot or whatever. But don’t get greedy though. When you see that your time is running out (on the top-left of your screen it’ll say *Ending Soon*), start heading back throwing the produce and all that. Because it will take time to throw the crops, walk over, pick them up, repeat, etc.
The next tip/trick is after you’ve met your quota. While you do get a bonus for over-gathering and delivering, it’s also based on the quota (a higher quota, or more difficult harvest request, gives you a higher bonus for over-gathering/delivering). So typically, I start with the easiest/lightest quota and move toward the harder ones (if multiple are present on the quest board). And the moment you see the *Ending Soon*, if this is one of the lower quota requests, deliver just enough to meet the quota. With the rest of the crops in your inventory, split them up (if you’ve forgotten, Ctrl + click) like I did in one of the screenshots. (I split them into stacks of 2 because splitting them all into individual ones is way too much effort.)
Once time runs out and you’re booted out, the client will usually catch you and confiscate some of the crops (you lose -1 karma for getting caught, but since you gain +1 karma for completing the request, nothing actually changes). But note that you only lose stacks of crops, which is why if you have everything in a single stack, you risk losing that entire stack (especially if it’s like 10 or more crops together).
Then start the next harvest request, and you can carry in all of the crops you gathered from the last job. (Refer to the second-to-last screenshot where I just entered the next quest but I already have a bunch of vegetables at the ready.) Which you can instantly deliver for a boost to your initial quota, and repeat!
(You can refer to my last image for an example of how this can play out. Note from the first picture in this section that I had job requests for 62.5s and 173.7s. But I played around delivering for the higher quota, and I got that massive bonus payout.)
Conclusion and agenda-plugging
And that’s it! I’ll probably add more to this guide as… idk, I keep playing the game or if I see frequently-asked questions, but I think this is a guide that I would’ve enjoyed and wanted to read before starting the game! Or just to fully inform myself as much as possible before starting!
It’s hard for me to think of what else to add to the guide because… there’s just no way to predict what someone might ask (refer to that Steam user who asked about how to use platinum coins and train skills, for example. Idk man…). So I’ll say this. Go to the Elona/Elin Discord and ask. It’s genuinely amazingly helpful and I’ve gotten so much help from all the users there. And I’ll probably be there myself too!
Also, if you’ve taken the time to read through all of this, thanks! I hope you really enjoyed this guide! I genuinely had a lot of fun because while it was a chore to write all of this up and screenshot and crop and all that, it was nice as I reflected upon how the early game was for me way back then and how things are now. You know that “Pepperidge Farm remembers” meme from Family Guy? Or like, “Kids nowadays have it too good”? Man, early alpha was especially brutal haha. It’s so much better nowadays! ;)
So yeah, thanks for reading! And please help share this guide so other Elin players can get ready for EA and enjoy the game when they start!
Also, here’s cute picture that’s perfect if you’re like, “What do I do in this game?” “It’s too hard.” “I’m feeling overwhelmed and lost.” “I want to leave a bad review on Steam.”
Agenda
If you’re also okay with it, I’d like to plug in my agenda here too! I guess… this matters to me because I’d like for people to set their expectations of this game straight. This, in particular, is directed to the Sseth crowd. So yes, it’s a very anti-Sseth agenda. Please read it here if you’re so inclined. If not, you don’t have to either!
Agenda: User:Mesherada/Agenda

